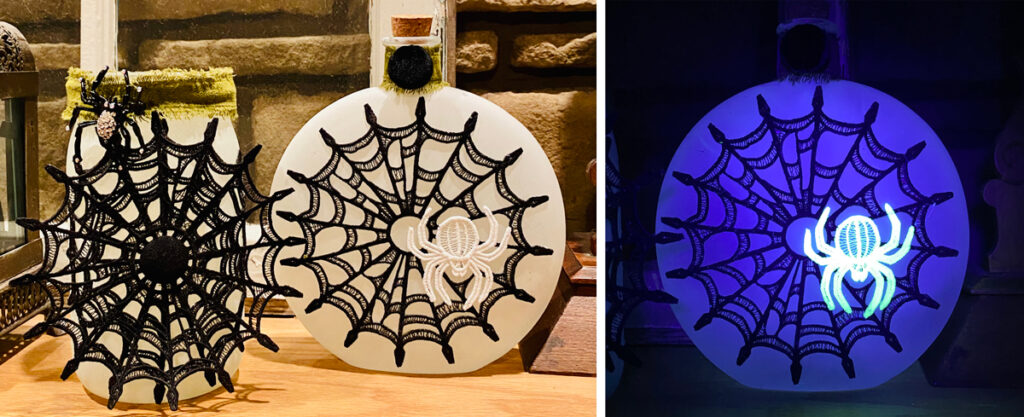
Looking for some Halloween decor that’s simple to create AND hauntingly beautiful? You’ve come to the right place! This machine embroidery tutorial will show you how to use freestanding embroidery to embellish some spooky bottles and jars for your Halloween display! This project is perfect for beginners who are just trying out freestanding lace or seasoned pro’s who’d like to use their skills to create a quick and easy project! Our Freestanding Buildable Spiderweb Doilies are incredibly versatile – stitch just a few spiderwebs and use them as accents like we did here, or stitch a whole set and combine them into a larger project like a table runner or placemat. Grab your supplies, and let’s get stitching!
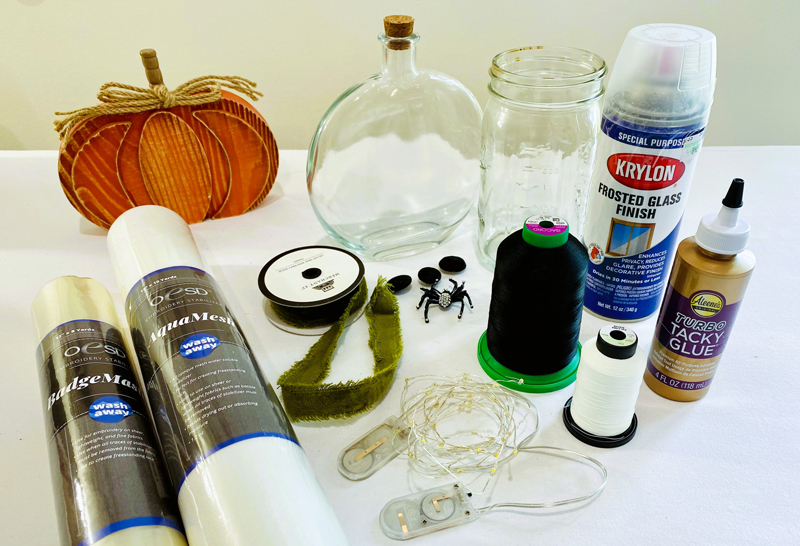
Supplies:
- Freestanding Buildable Spiderweb Doilies 12956
- Isacord #0020 Black Thread and Bobbin
- Isa TEXLIGHT Glow in the Dark Thread
- OESD AquaMesh WashAway
- OESD BadgeMaster
- OESD Perfect Snip
- OESD Pixie Lights
- Jars or Bottles
- Frosted Glass Paint
- Assorted Jewelry and Buttons
Instructions:
Step 1
Gather your supplies.
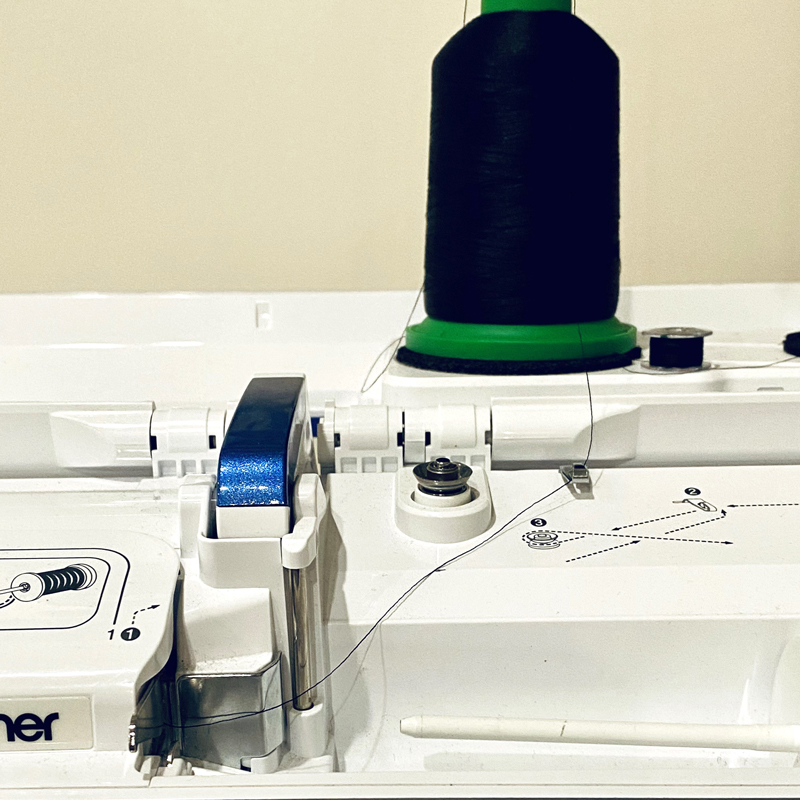
Step 2
Thread embroidery machine with black thread and black bobbin.
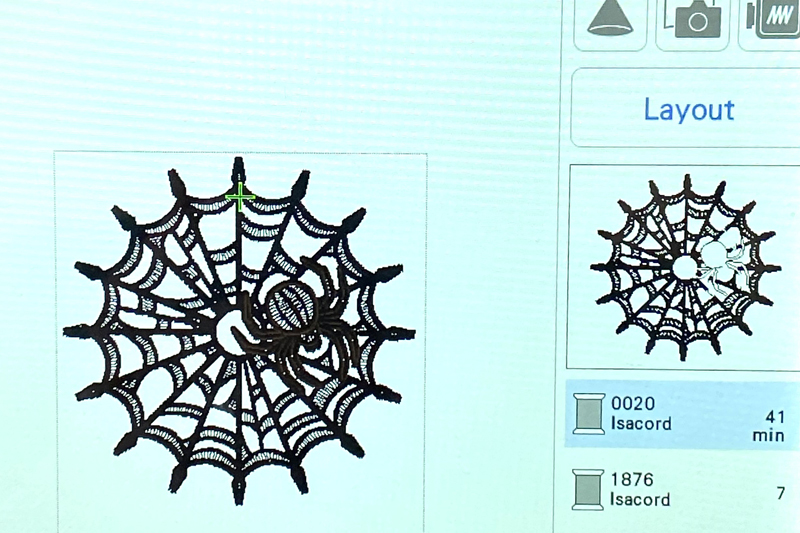
Step 3
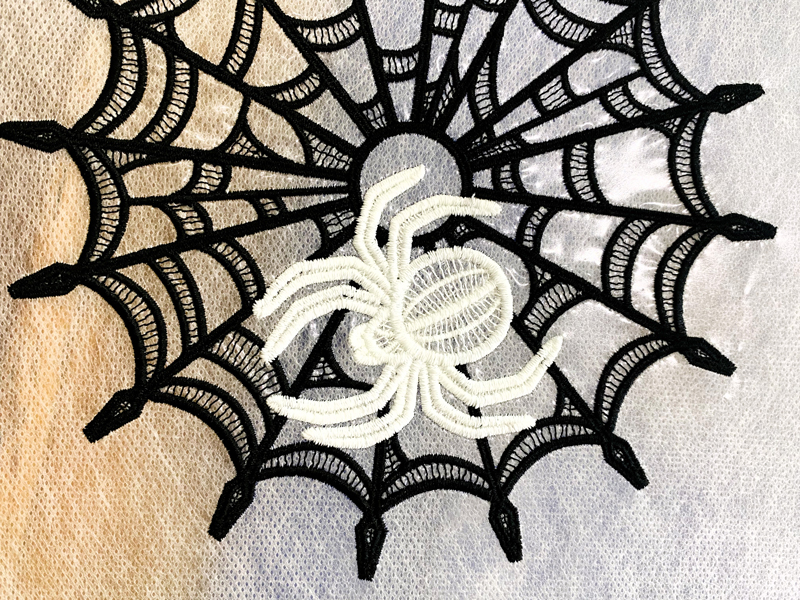
Download Buildable Spiderweb Lace Doilies to your embroidery machine. We loaded design #12956-5 for this project.
Step 4
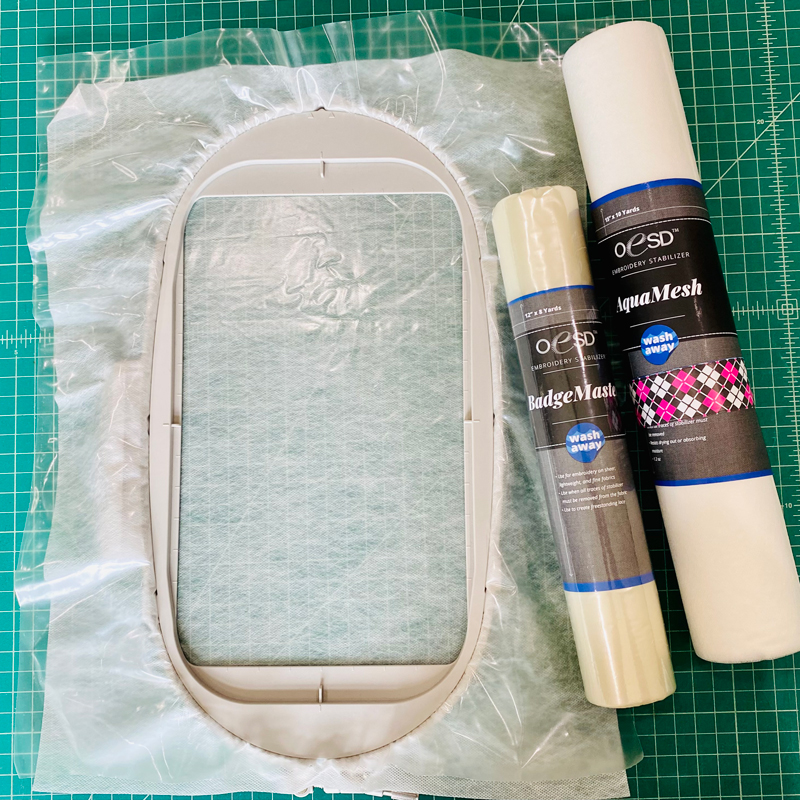
Cut 1 piece of OESD BadgeMaster and 1 piece of OESD AquaMesh larger than your embroidery hoop. Layer BadgeMaster on top of AquaMesh and pull layers tight in the hoop.
Step 5
Before stitching Step 2, change the top and bobbin thread to Isa TEXLIGHT Glow in the Dark. Stitch additional spiderwebs as desired.
Step 6
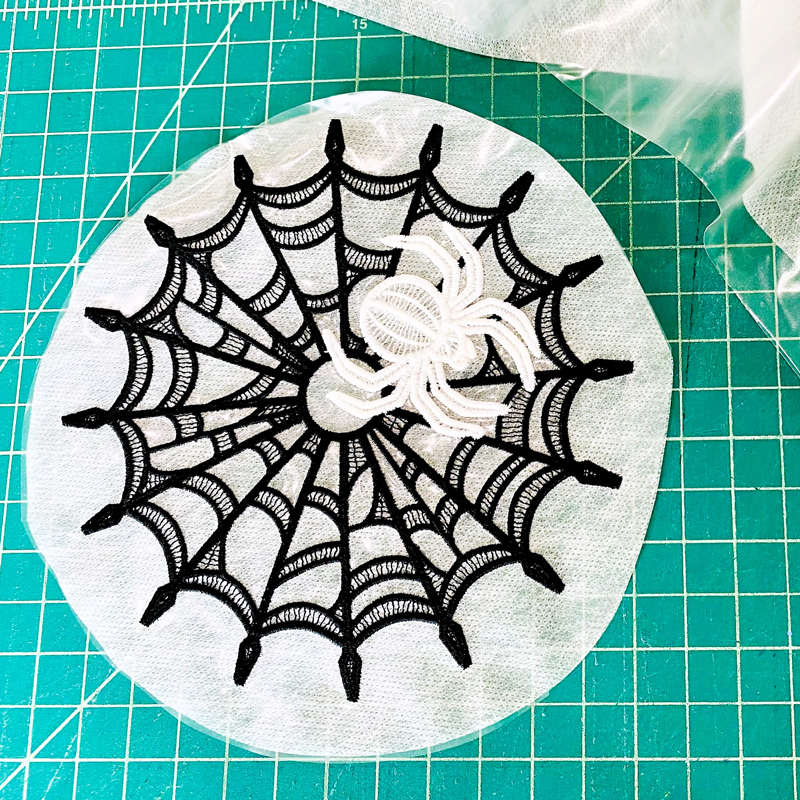
Remove stabilizer from the hoop and cut excess stabilizer from around each web. Remove thread tails using OESD’s Perfect Snips.
Step 7
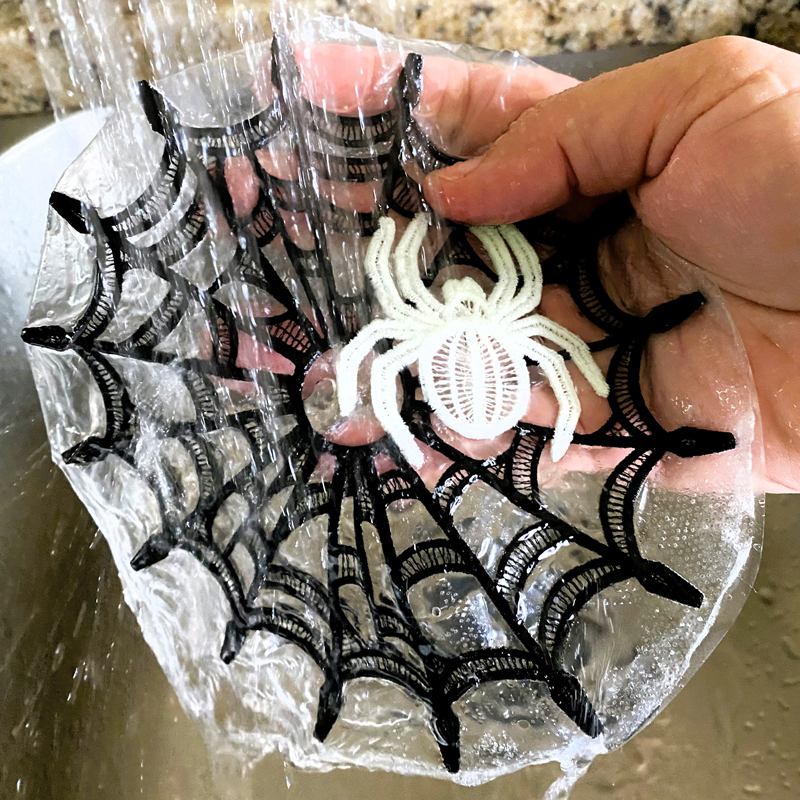
Rinse your spiderwebs under warm running water. Allow to dry on a flat surface.
Step 8
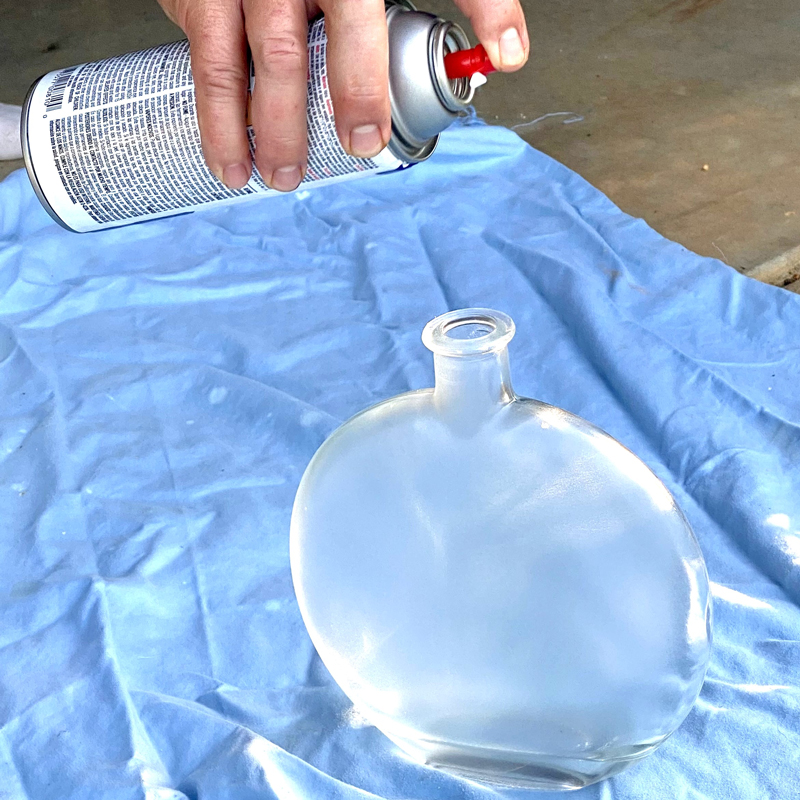
Spray your bottles or jars with frosted glass paint in a well-ventilated area.
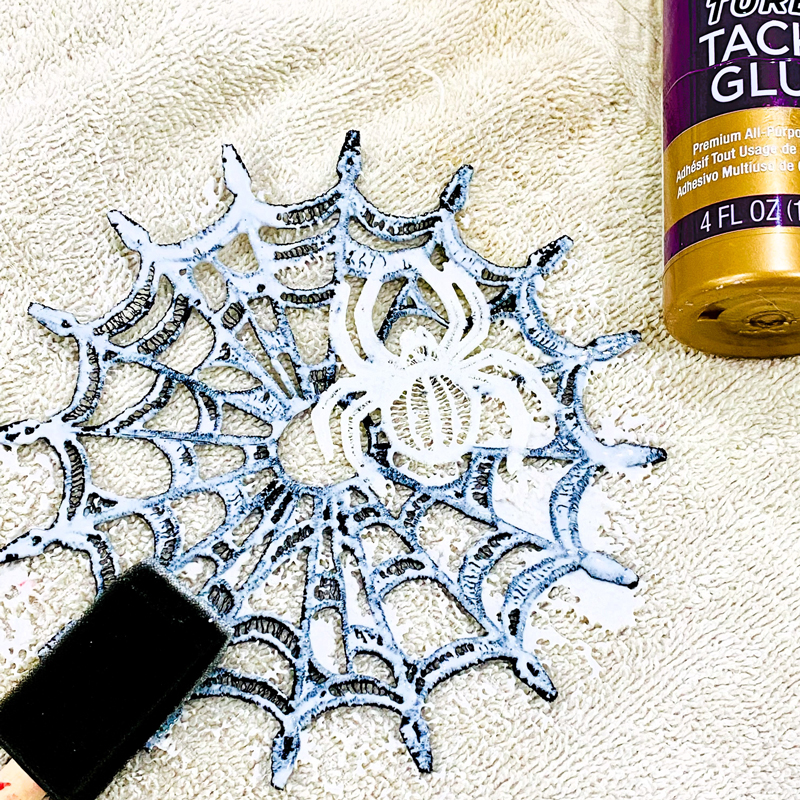
Step 9
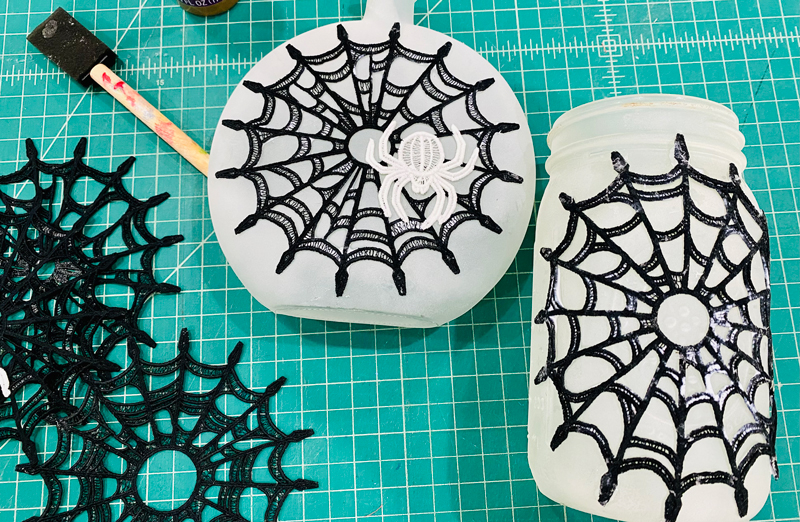
Coat the back of your spiderweb with glue.
Step 10
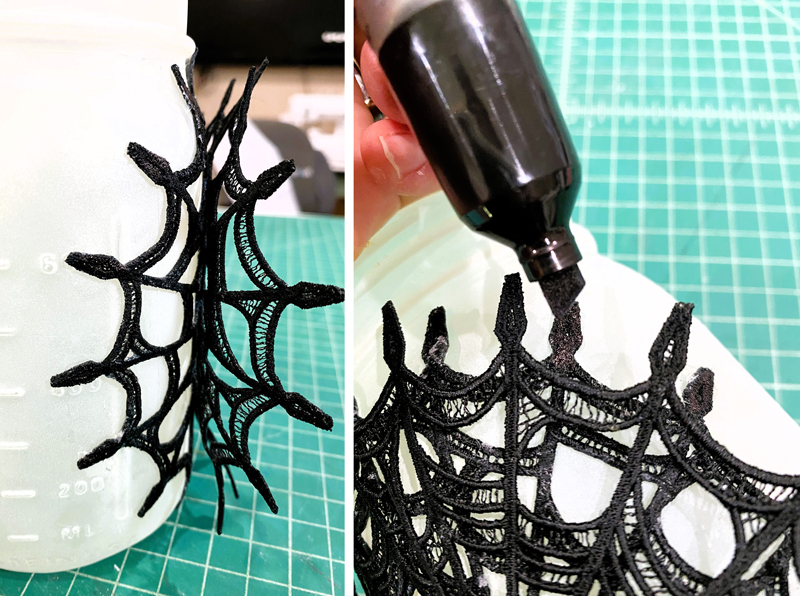
Press your spiderweb firmly against the jar. Allow the glue to dry completely before adding any embellishments. If you’d like, add a second web for a 3-D effect.
Step 11
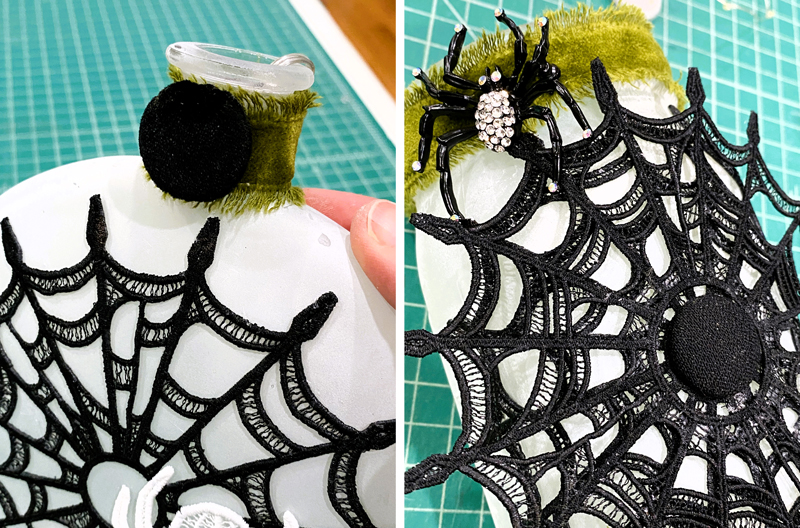
Once the glue is dry, use a black marker to cover any white spots where the glue did not dry clear.
Step 12
Attach ribbon and add embellishments, including jewelry and buttons.
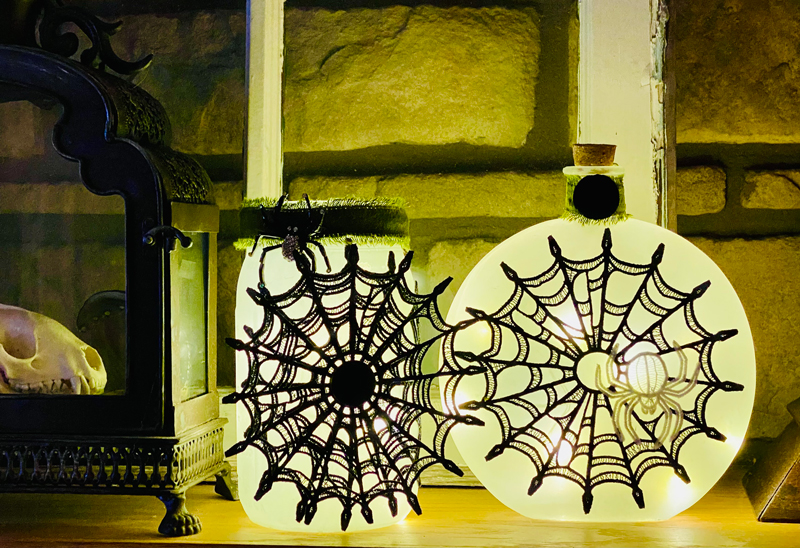
Step 13
Place OESD Pixie lights inside the jars to illuminate.

JOIN US IN THE OESD COMMUNITY!
We hope you enjoyed this machine embroidery tutorial! Have you created your very own project with Buildable Spiderweb Doilies? Come show off your work in our private Facebook group, The Perfect Stitch!