Customize an existing hoodie with this tutorial. Learn how to replace the front pocket and add spikes down the back for a unique wearable for a child.
by Morian Grady

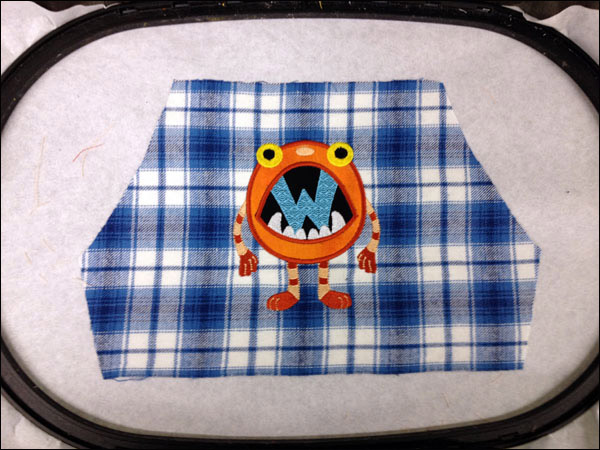
This monster hoodie was made using the Monster Monogram Appliques #12501 embroidery design collection. First and foremost, you have to pick colors (hoodie, pocket, spikes, monster, etc.) before you can start on your project. I picked a navy blue hoodie, picked out a blue plaid flannel for the pocket, and orange felt for the spikes. I decided to change the blue monster (design #12501-23) to an orange one and picked applique fabric and thread colors.
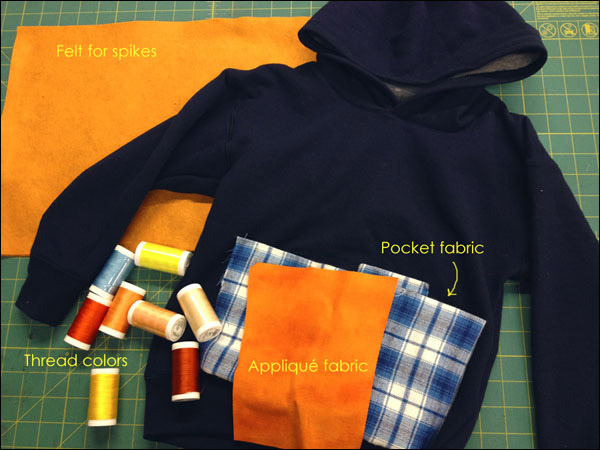
The monster pocket:
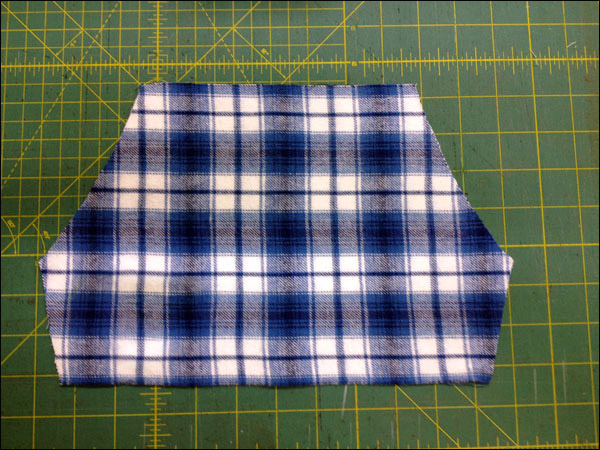
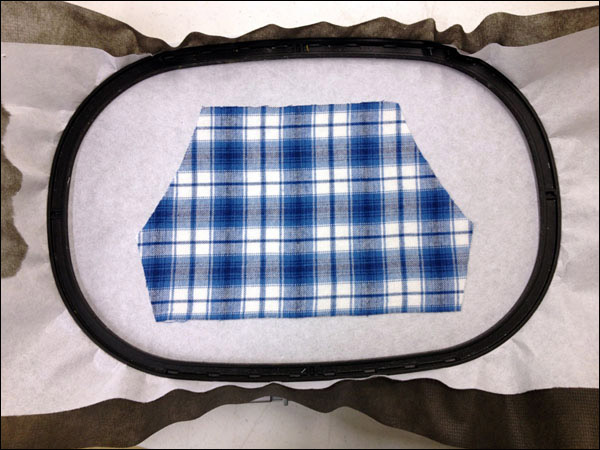
My sweatshirt already had a pocket. If I had wanted to use that pocket, I would have removed only some stitches to allow for hooping, and left the longest section stitched. Instead, I removed the whole pocket and used it as a pattern to make my own pocket out of some plaid flannel I had picked out.
I recommend hooping two layers of ultra-clean and tear to stitch the monster on the pocket. I used a layer of polymesh and a layer of ultra-clean and tear, with the ultra clean and tear on top. From this, I learned a newbie lesson: if you use a tear away and a cutaway, make sure the tear-away is on the bottom/back so you can tear it all away. If I were to make it over again I would just use two layers of ultra-clean and tear.

I had enough fabric for the pocket to just hoop some fabric, sew the design, THEN cut the pocket shape out. I could just claim I wanted to waste as little fabric as possible…but really this was just another newbie learning experience. So, here’s what I did:
I made a paper pattern using the old pocket for reference, though I did make it a little larger than the original pocket. Next, I marked the center of the paper pattern and folded the paper in half along the vertical line. I will explain the reason in a moment…
Next, I lightly sprayed the paper pattern with some spray adhesive. Since the plaid is slightly stretchy and I wanted the stripes to be as straight as possible, after placing the pattern on the fabric, I tugged here and there to make the stripes straight before cutting it out. I left the paper pattern stuck to the fabric for the next step.
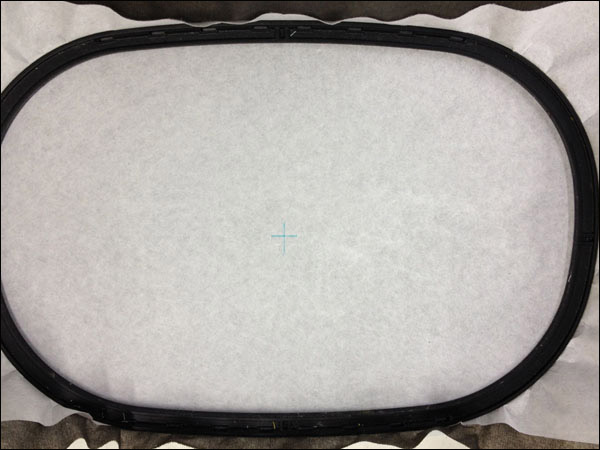
I marked the center of my hooped stabilizer with a wash away pen, then sprayed it with spray adhesive.
Next, I folded the plaid pocket along the line that the paper had already been folded. I then stuck a pin through the center and positioned the folded edge of the fabric and the pin along the + I had drawn on the hooped stabilizer.
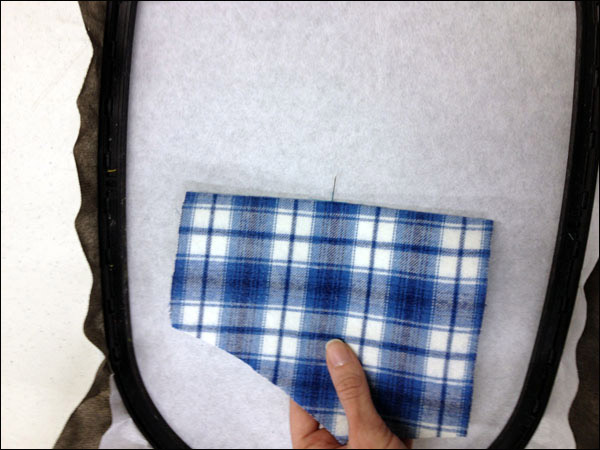
This way I could get the pocket perfectly centered on the hoop. Once the pin and folded edge of the fabric are stuck to the stabilizer lined up with the +, you can remove the pin and unfold the pocket. After it is stuck flat and centered on the hoop you can remove the paper pocket pattern, being careful not to pull the pocket fabric off of the stabilizer.
Next, I put the hoop on the machine and stitched my monster.
I made a liner for the pocket to the boy wearing it wouldn’t pick at the embroidery on the back, but that’s not necessary. I simply used the same pattern and trimmed it slightly shorter. I hemmed them both and stitched them together.
Next, I stitched the pocket on to the sweatshirt, making sure to NOT sew all the way around. (leave room for the hands)
The spikes:
I have seen this same method in several places online.
I marked the centerline down the back of the hoodie, then measured and did a little math to decide how many and how big my spikes should be. (I decided 4 spikes on the hood and 4 on the back, but this all depends on how big your hoodie is.) I made a simple diamond shaped pattern and cut out 8 spikes and pinned them down the center line.
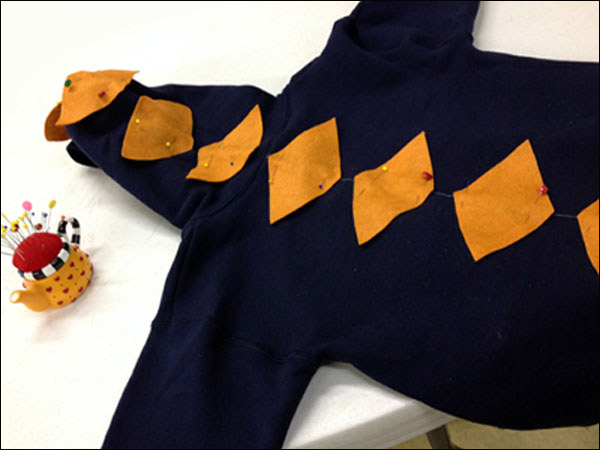

I matched thread with the hoodie and stitched a single line down the middle of all the spikes. Next, I folded them together and tried to use a fusible tape to hold the pieces together. This was another learning experience, the fusible tape didn’t really work on the felt, so I went back to the machine and stitched them.
Thanks to our kid model, Kai W.!
This material is © OESD, LLC and may not be reproduced or published without permission.