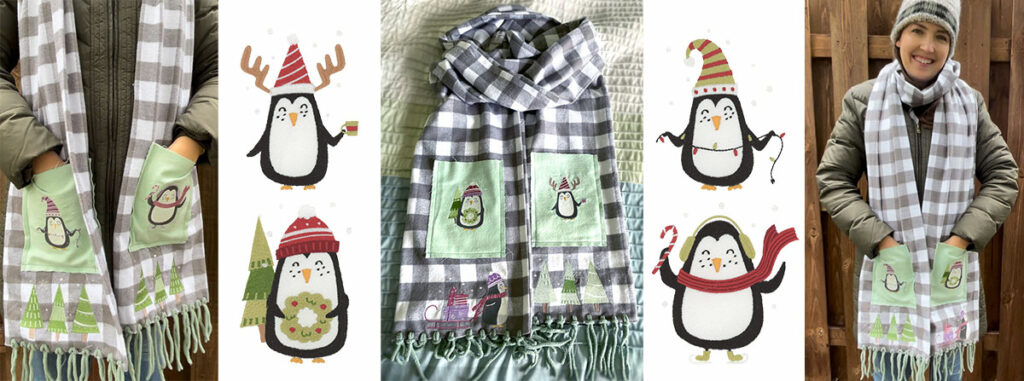
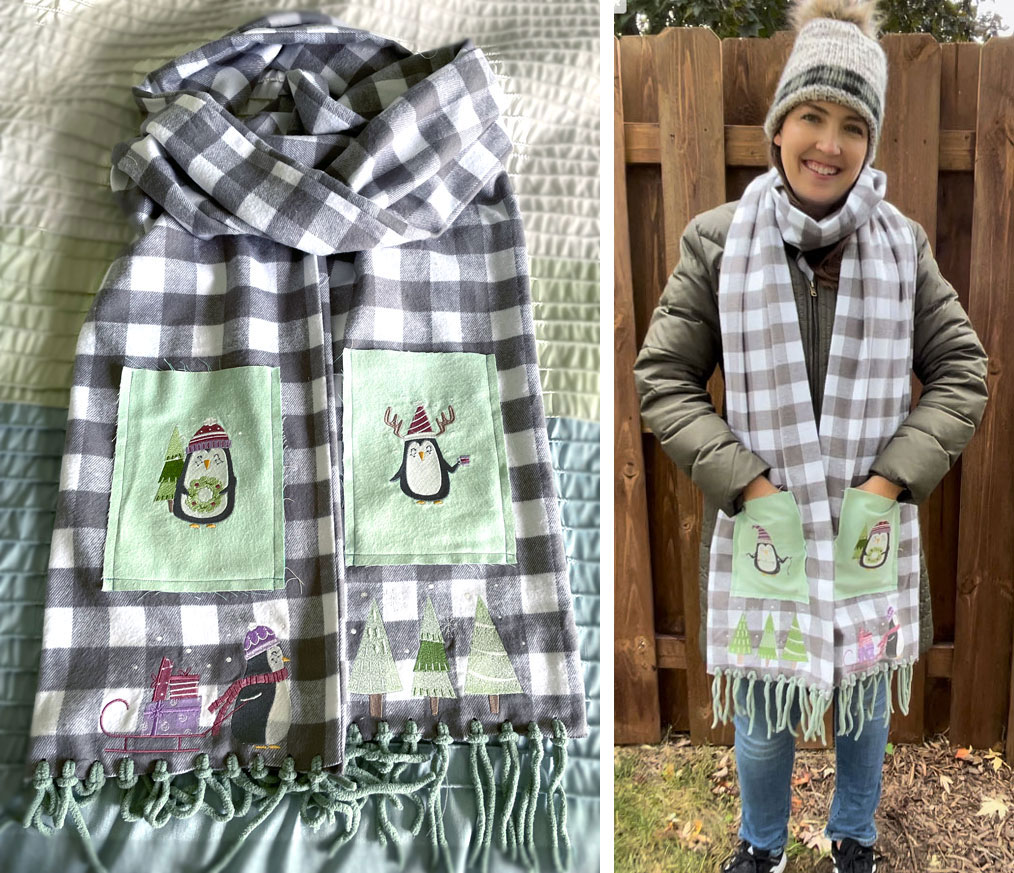
If this winter season has you looking to spruce up your wardrobe with a homemade project for yourself or a loved one, look no further than our Festive Penguin Winter Scarf! Follow this easy, beginner-friendly machine embroidery tutorial to create a cozy new cold-weather accessory. They’re quick to create so you can craft up one for yourself, then gift them to friends and family. Who wouldn’t love the cozy warmth of this stylish and useful scarf, perfectly decorated with some cheerful penguin companions? Not only does it keep your neck warm, but the pockets are handy to protect your hands from the cold as well as store your phone or keys! Get excited as you grab your thread and fabric because it’s time for us to start stitching!
Supplies:
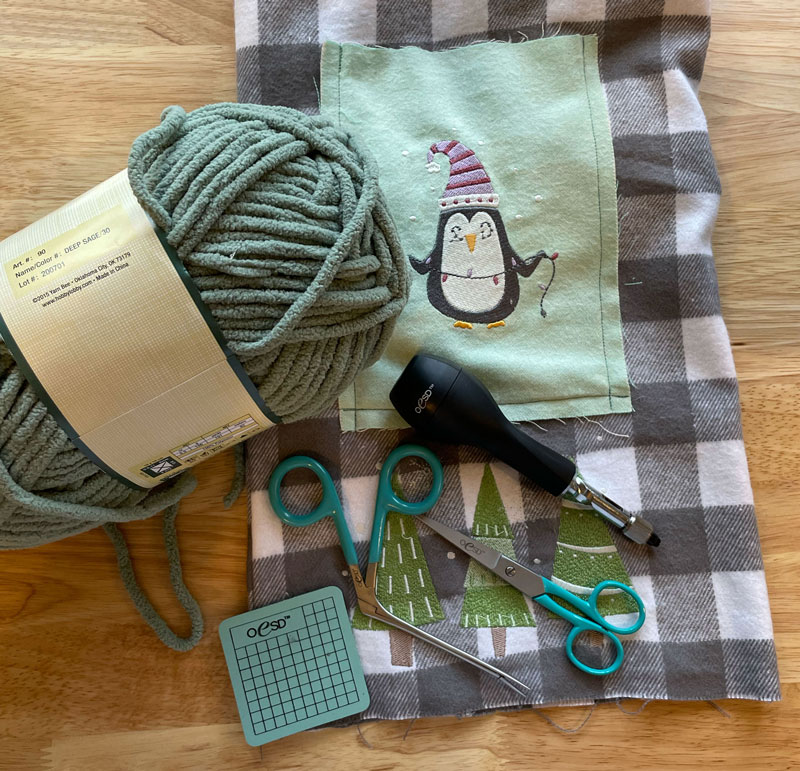
- Festive Penguins by Ammie Gomez PK90007
- OESD Heavy Weight TearAway
- OESD Medium Weight TearAway
- OESD StitcH2O
- OESD Gentle Touch
- OESD Perfect Punch Tool
- OESD MiniMAT
- 105″ x 22″ Fleece Fabric
- 4 pieces of fabric for pockets – each 8″ x 10″
- Yarn
Instructions:
Making the Pockets:
Step 1
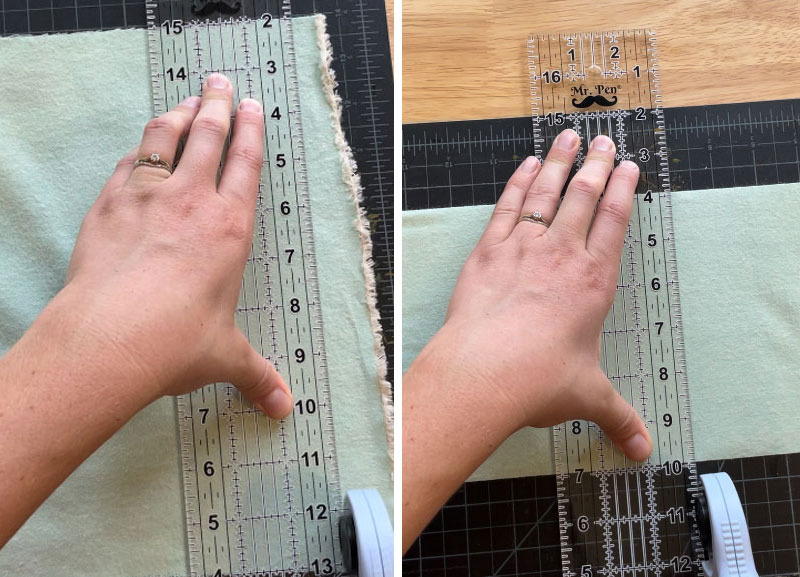
Cut fabric for pockets. We cut ours to 8″ x10″ which is larger than necessary. You will square off and cut the fabric to size in a later step.
Step 2
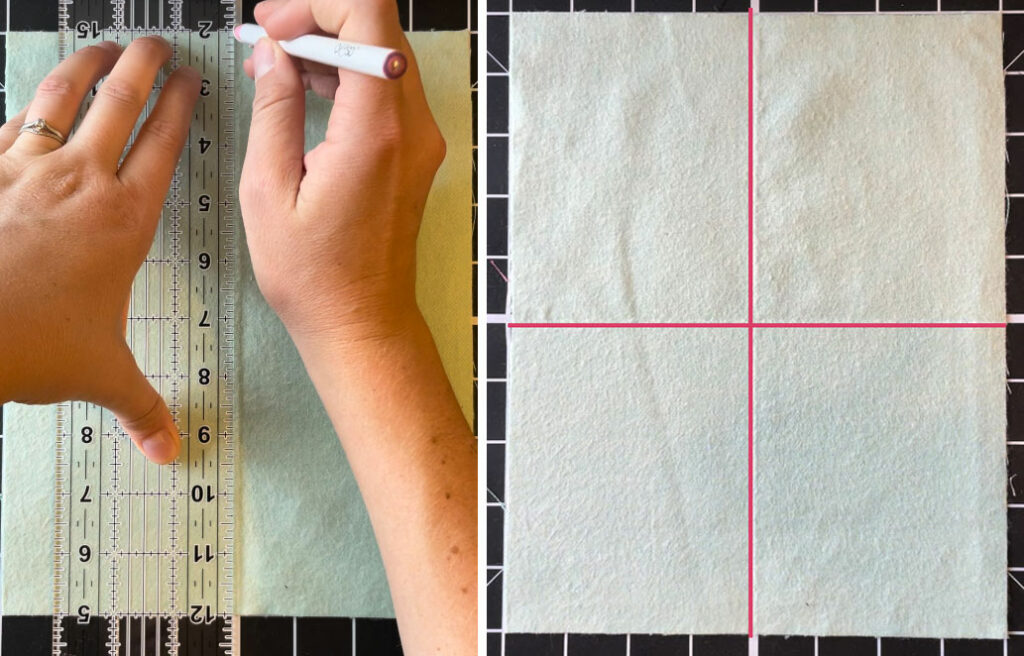
Mark center of fabric with the OESD Perfect Pencil.
Step 3
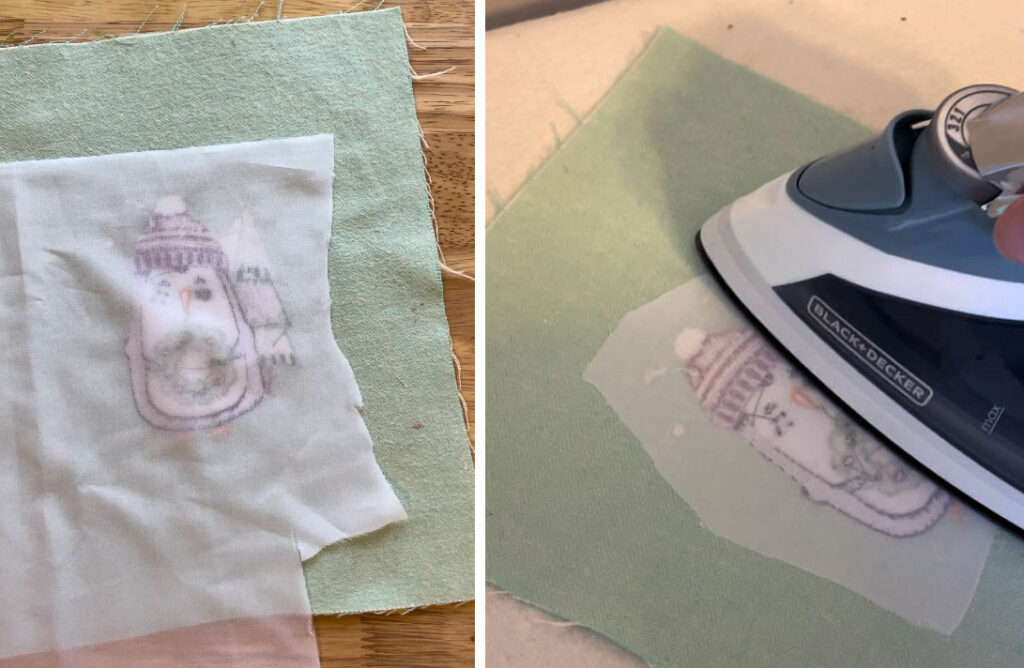
Hoop 1 layer of HeavyWeight TearAway and 1 layer of MediumWeight TearAway. Add 1 layer of Stitch2O to the top.

Step 4
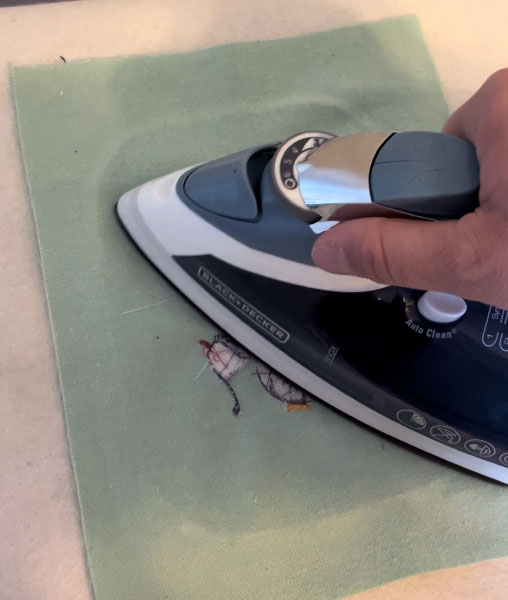
Follow the steps on your embroidery machine to stitch out design. Remove stabilizer and press.
Step 5
Add Gentle Touch to the back of your stitched designs. This will make it feel nicer when using the pockets.
Step 6
Trim and square off fabric so the final size is 6″ x 8″. Repeat with the other 3 pockets.
Making the Scarf:
Step 7
Mark center the center of your fabric, and then mark the center of each side. Measure approximately 2″ from the bottom and mark. This will be the placement for the bottom of your design. Make sure your chosen design is facing the bottom edges of the fabric.
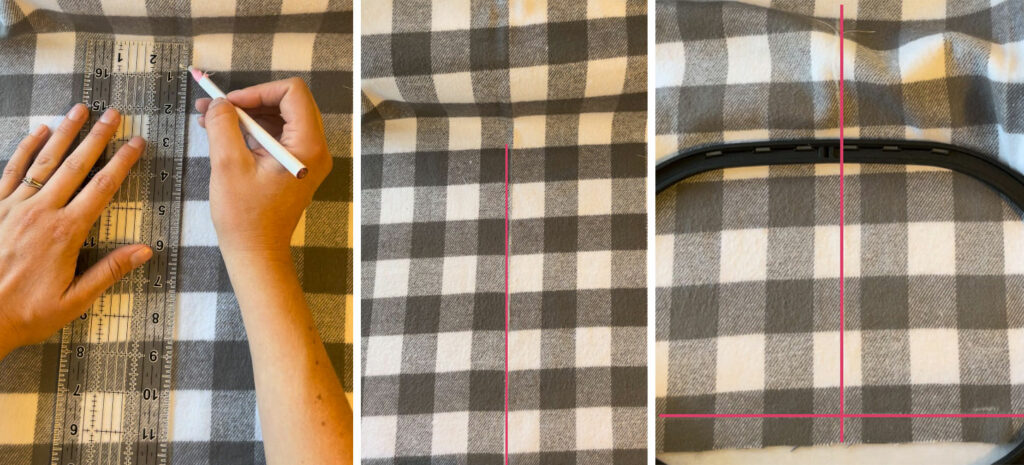
Step 8
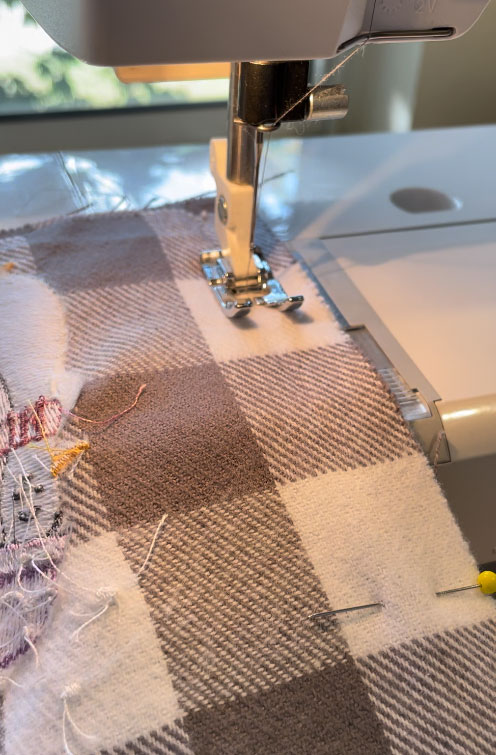
Hoop 1 layer of HeavyWeight TearAway and 1 layer of MediumWeight TearAway. Add 1 layer of Stitch2O. Follow machine steps and stitch out your lower design on the scarf fabric. Remove stabilizer and press.
Attaching Pockets:
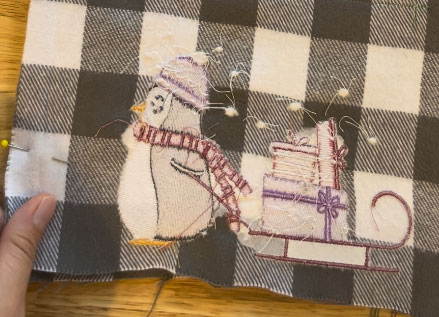
Step 9
With the scarf laying fully flat, pin one pocket 5 ½” from bottom and 2 3/8″ in from the sides.
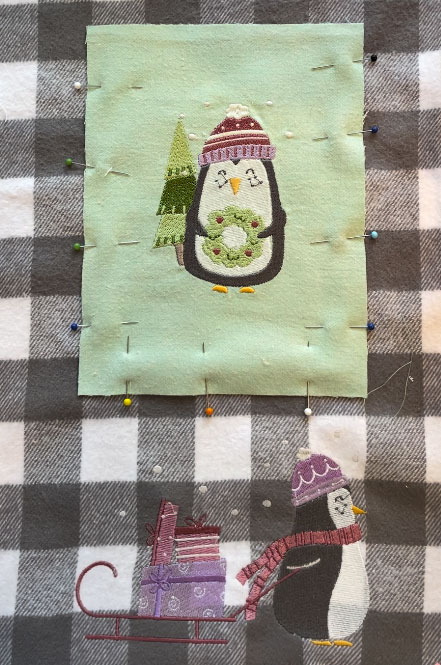
Step 10
Top stitch along the sides and bottom using a 1/4 in seam allowance. We kept our edges exposed to go with the style of the scarf. Use Fray Check on the edges to help prevent fraying if desired.

Step 11
Continue with the other 3 pockets.
Assembling the Scarf:
Step 12
Fold the scarf in half rights sides together. Make sure to fold it the long way.
Step 12
Sew along the long edge with ½ in seam allowance. Keep the bottom edges open.
Step 13
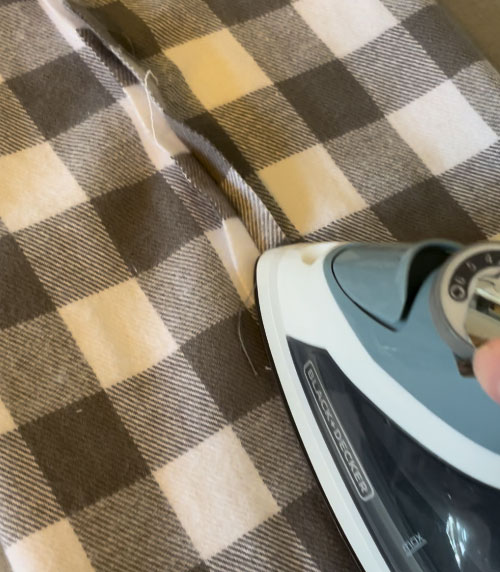
Press the seam and flip right side out.
Step 14
Using the OESD Perfect Punch and MiniMAT, punch holes in the bottom approximately 2″ from the edge. We did 10 holes.
Step 15
Cut yarn, fold it in half, feed it through the hole and tie together. Repeat for the other side.
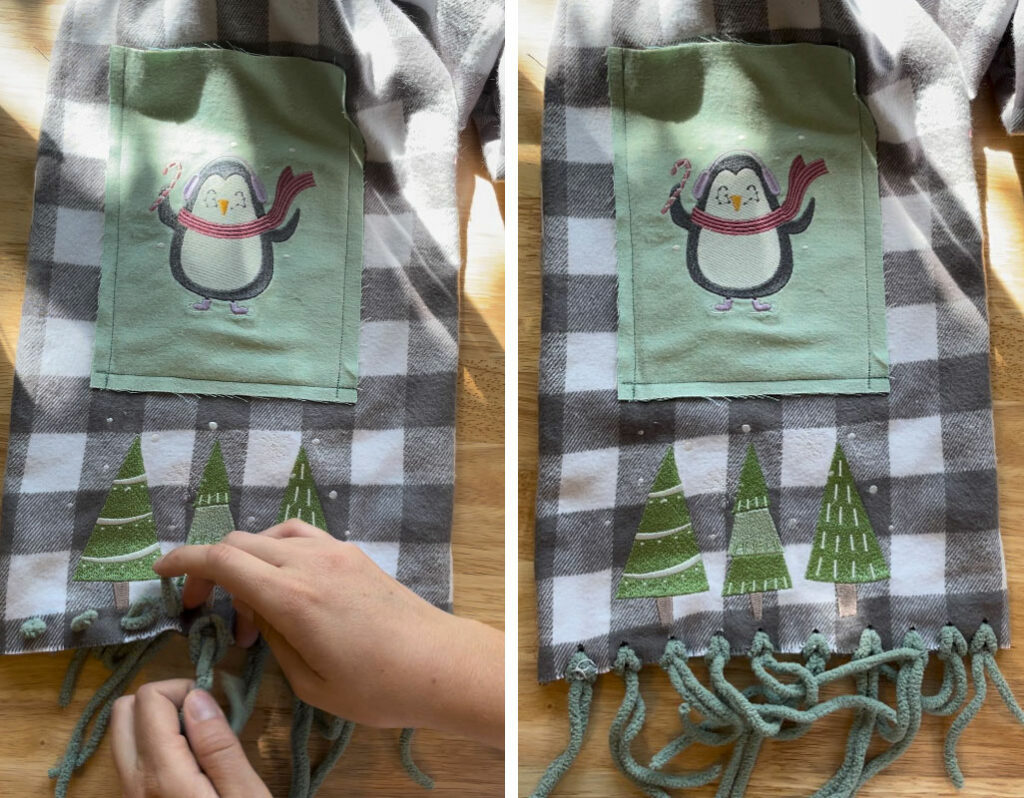
Step 16
Stay cozy with your brand new embroidered pocket scarf!

JOIN US IN THE OESD COMMUNITY!
We hope you enjoyed this machine embroidery tutorial! Have you stitched your own Festive Penguin Winter Scarf? Come show off your work in our private Facebook group, The Perfect Stitch!