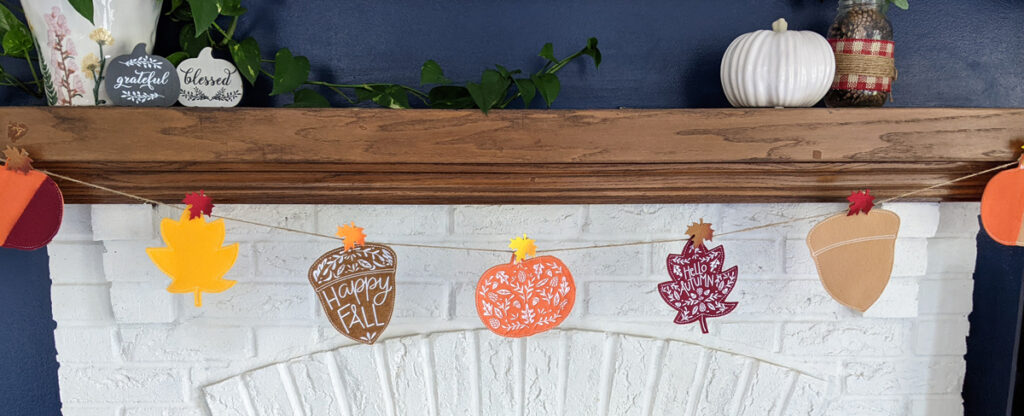
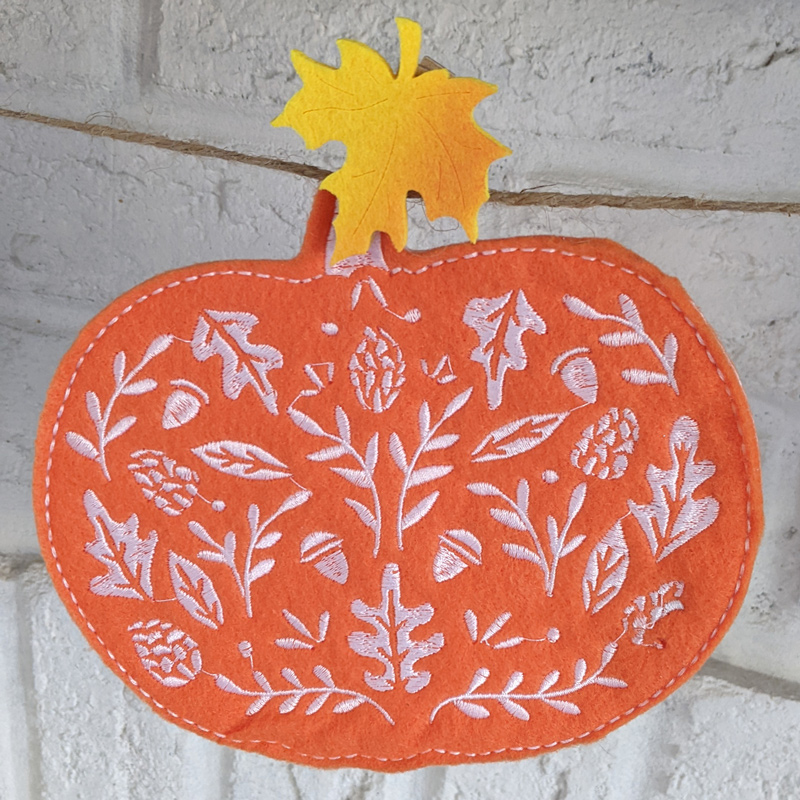
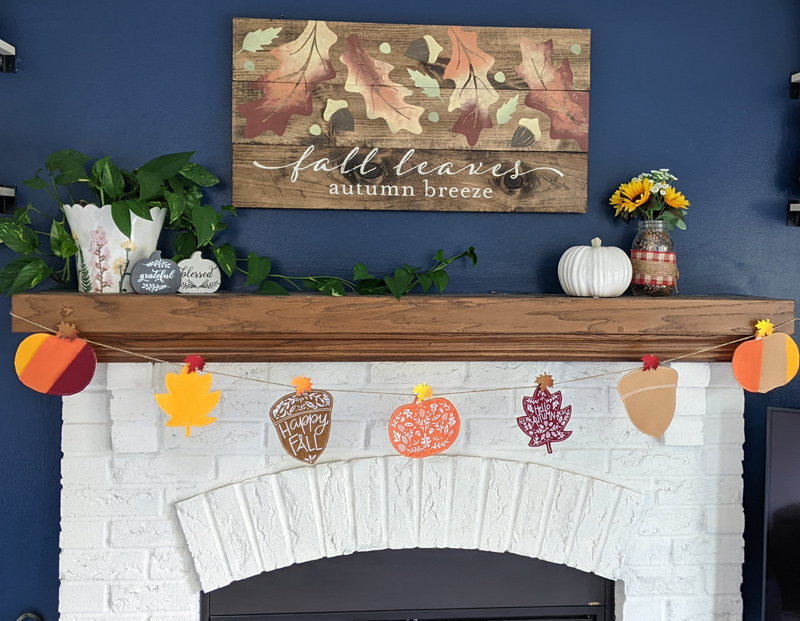
Fall is here and it’s time for all things cozy and pumpkin-spiced! If you’re looking to add a touch of warmth and charm to your space this season, we’ve got the perfect project: this Easy Fall Felt Banner! Using just a few supplies and your embroidery machine, you can create this Easy Fall Felt Banner in no time at all. It features our Fall Felt collection by Pen + Paint, mixing and matching the fully embellished designs as well as the outlined shapes. This is a great beginner project and can be easily customized with your favorite felt colors and configurations! Get ready for some Autumnal magic…let’s start stitching!
Supplies:
- Fall Felt by Pen + Paint – PK90004
- OESD Medium Weight TearAway Stabilizer
- OESD Expert Embroidery Tape TearAway
- Felt in assorted autumn colors
- Twine
- Decorative clips or clothespins – we found a set embellished with cute leaves at Hobby Lobby
Instructions:
Step 1
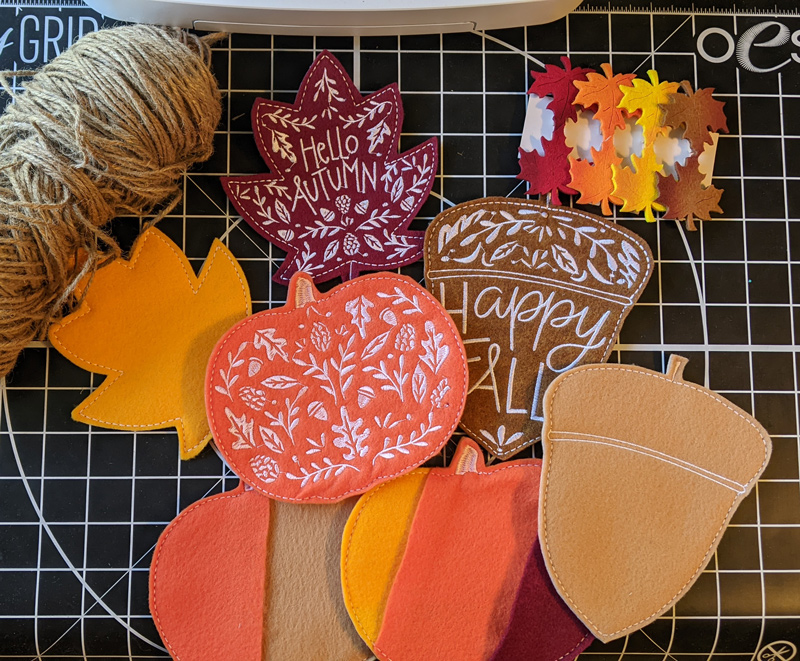
Cut felt approximately 7”x6”. Make sure to cut 2 per design (front and back).

Step 2
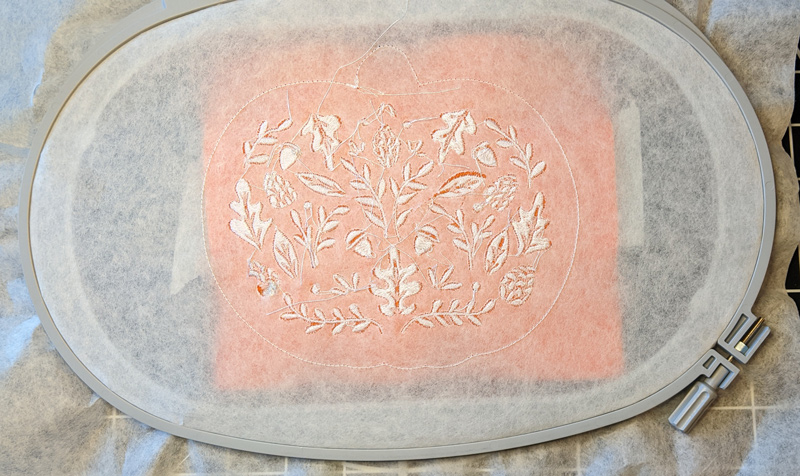
Follow instructions from PK9004. First, hoop Medium Weight TearAway.
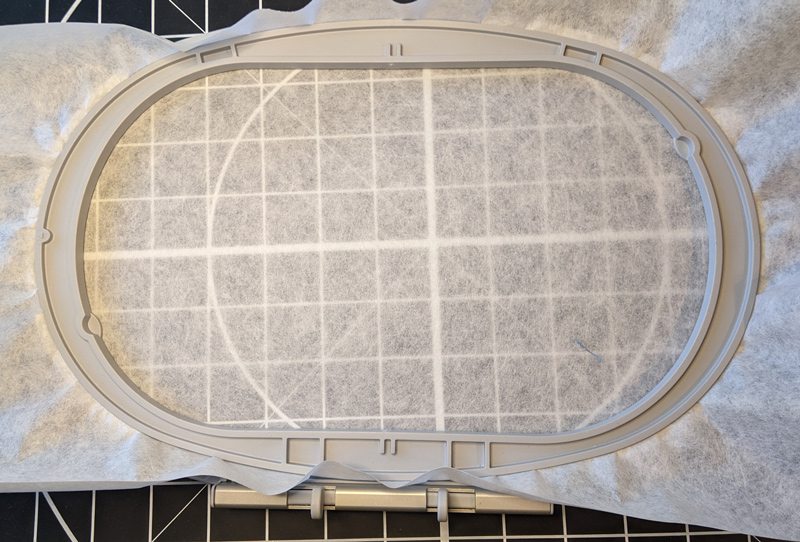
Step 3
Stitch the placement stitch.

Step 4
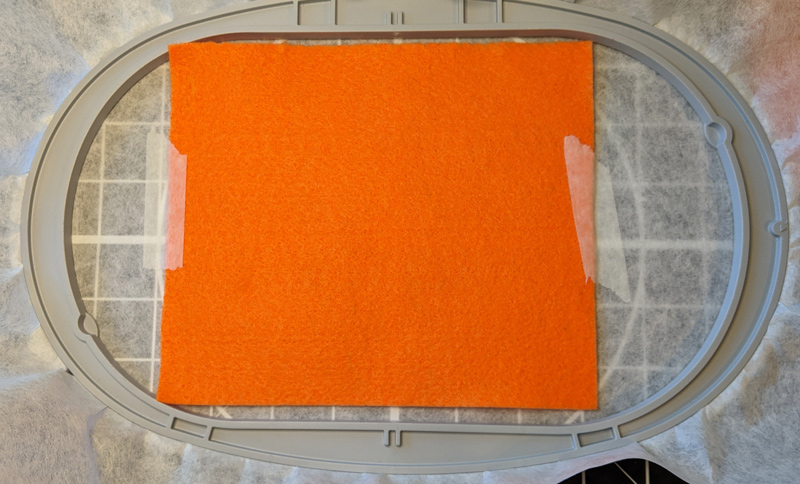
Place your first piece of felt on hoop and secure with Expert Embroidery Tape TearAway.
Step 5
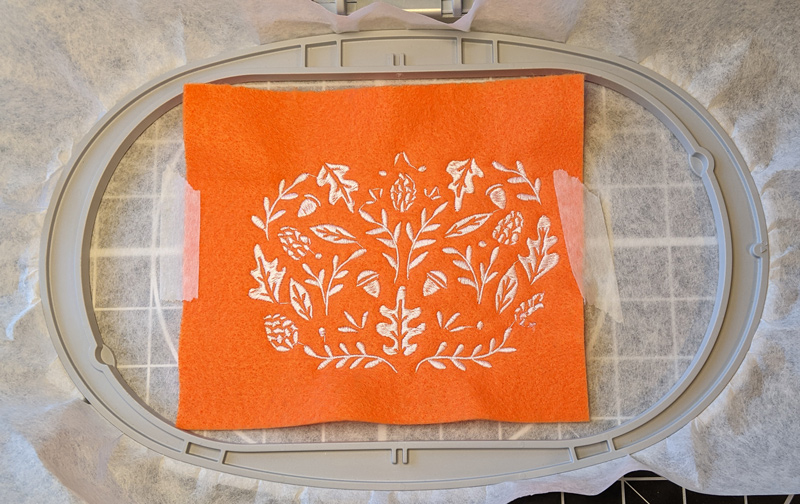
Stitch all machine steps, and remove the hoop from your machine, but not the project from the hoop.
Step 6
Flip your hoop over and carefully secure the edges of the second piece of felt with tape. Make sure you do not press too hard.

Step 7
Stitch the final step, remove your project from hoop, and trim to shape inside the final cut line. Repeat with other designs. Feel free to stitch out the full designs, or just the outlines. You can even play around with mixing fabrics to make a pattern.
Step 8
Check out your local craft or home decor store for some decorative clips or clothespins. We found these fun autumn leaf clips at Hobby Lobby!
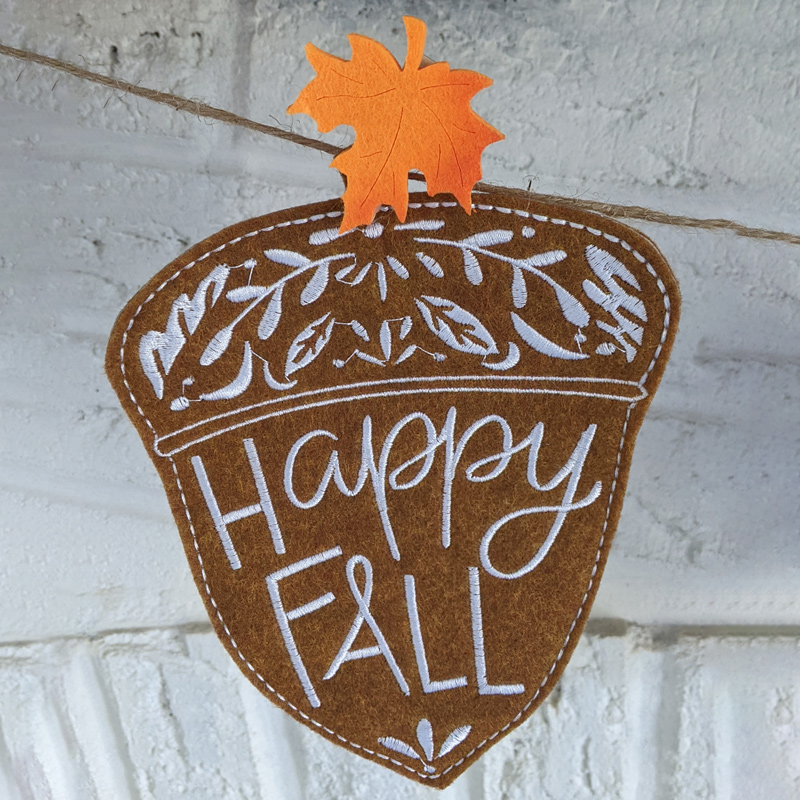
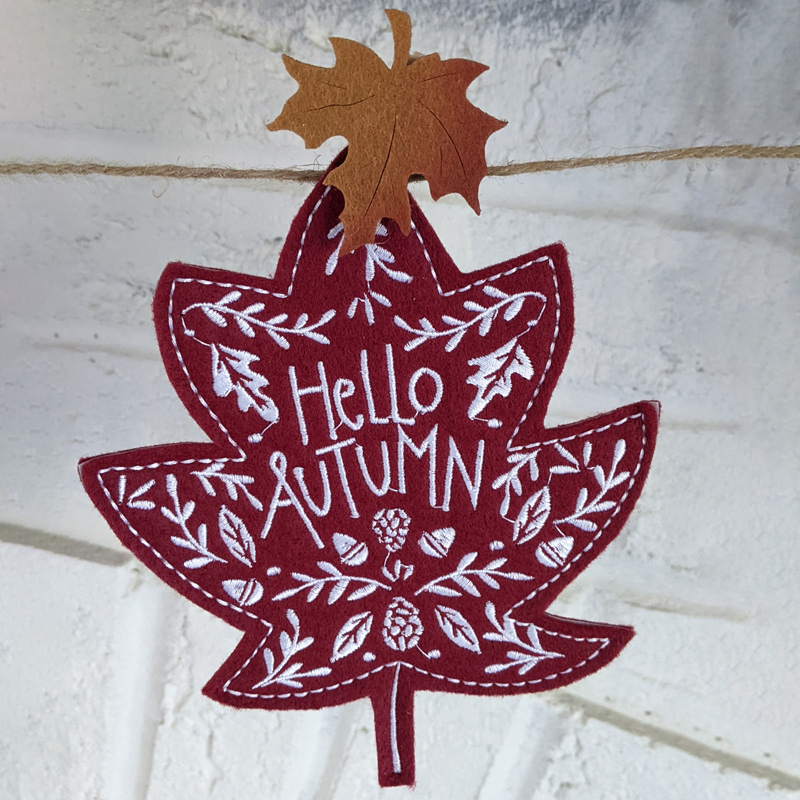
Step 9
Once all designs are stitched out, secure to some twine, hang up and enjoy for the autumn season!

JOIN US IN THE OESD COMMUNITY!
We hope you enjoyed this machine embroidery tutorial! Have you stitched your own Easy Fall Felt Banner? Come show off your work in our private Facebook group, The Perfect Stitch!