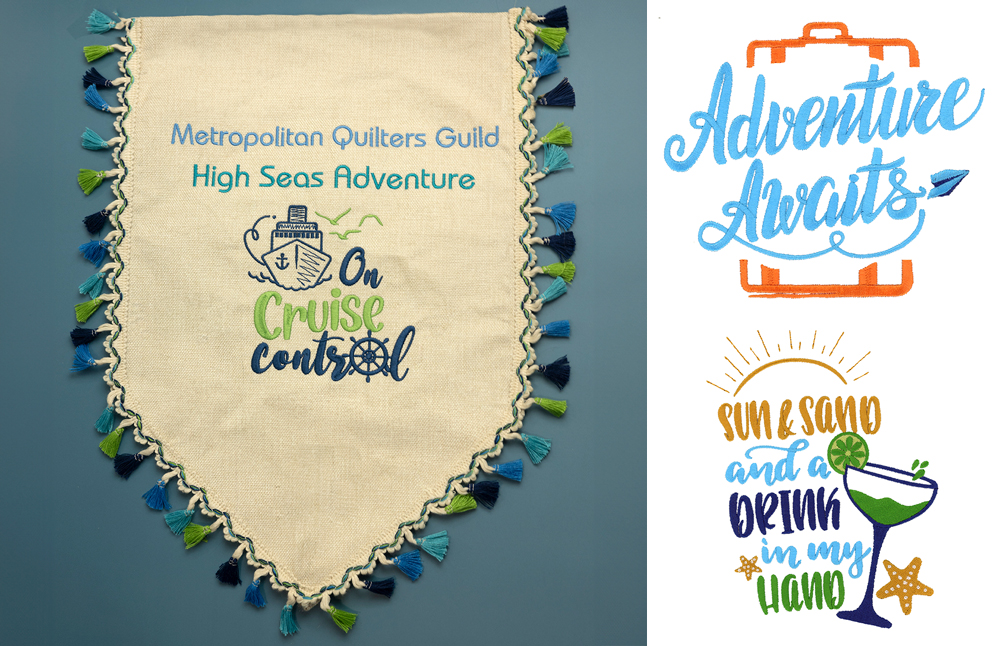
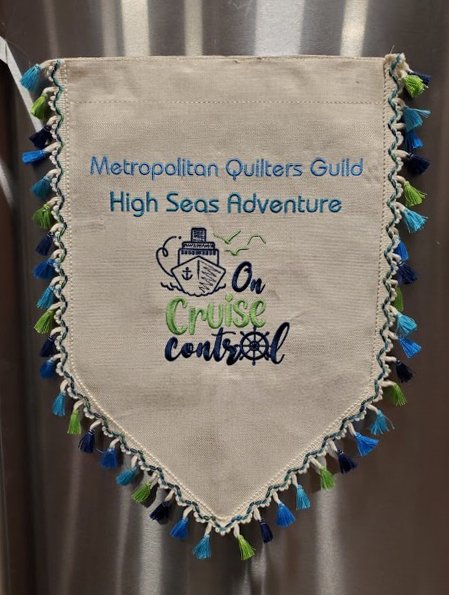
Celebrate your sail on the high seas with this Cruise Ship Door Banner! Follow this short machine embroidery tutorial to create your own stitched decoration for your door using an OESD Garden Flag Blank and just a few simple supplies. This project is also great to customize with your favorite designs to celebrate an occasion or hang on your front door to welcome guests to your home! Grab your thread, stabilizer, and tools, and let’s get stitching!
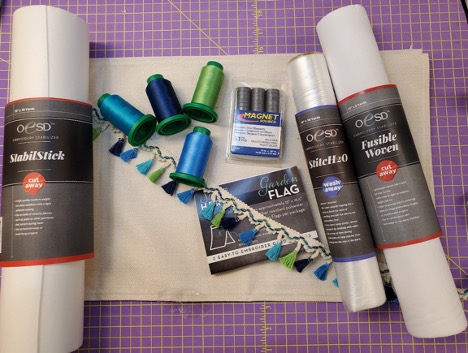
Supplies:
- Adventure Awaits Collection 51341
- OESD StabilStick Template Sheets
- OESD StabilStick CutAway
- OESD StitcH2O
- OESD Fusible Woven
- OESD Start Here Garden Flag Blank
- OESD Expert Point & Press Tool
- Decorative Trim of your choice
Instructions:
Step 1
Gather your supplies.
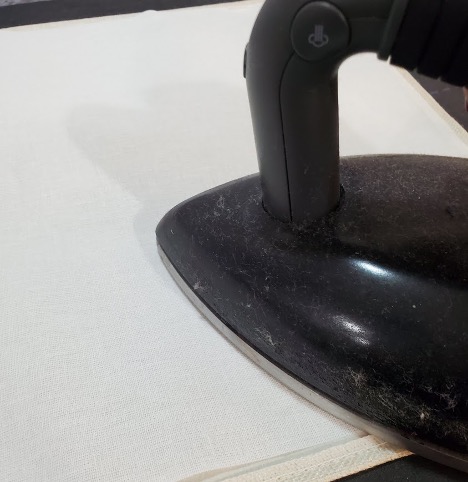
Step 2
Cut Fusible Woven to fit the back of your garden flag and press it to the back.
Step 3
Create the triangular bottom of the banner: Fold the flag right sides together lengthwise, creating a long and skinny rectangle. The garden flag blank’s pocket will now be in the middle. Bring the corners to the center and stitch a seam next to the hem on the right and left sides


Step 4
With the fold on the bottom, trim the right corner. This will help to reduce bulk in the seam and create a nice point at the bottom.
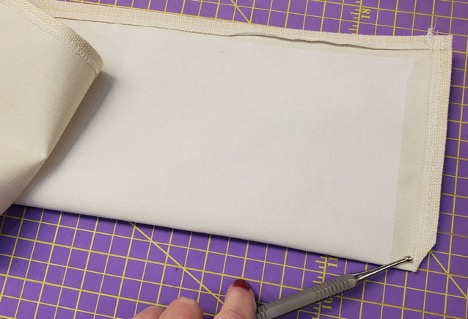
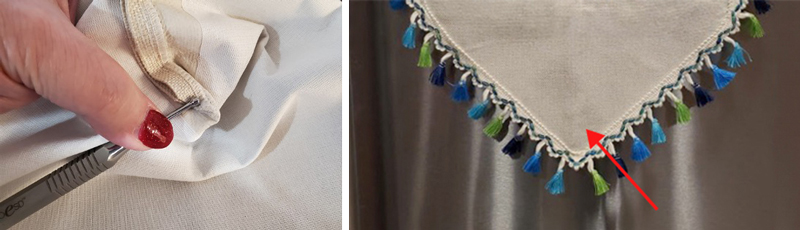
Step 5
Using the Point and Press Tool, turn the corner right side out. Repeat for the other side. When you turn this inside out, the bottom will now come to a point, creating the banner’s shape at the bottom.
Step 6
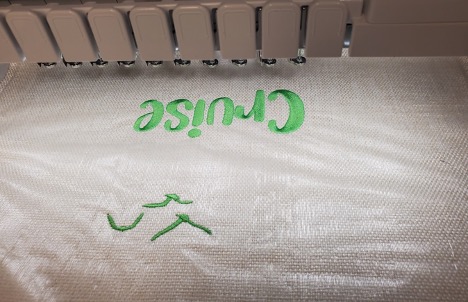
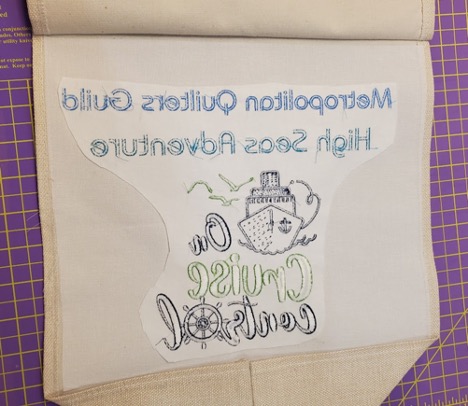
Print your design on a StabilStick Template Sheet. We added words to ours – you can use your design software or embroidery machine. Position your design on the flag.

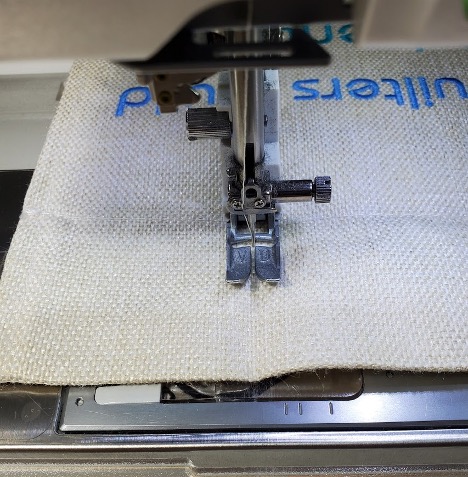
Step 7
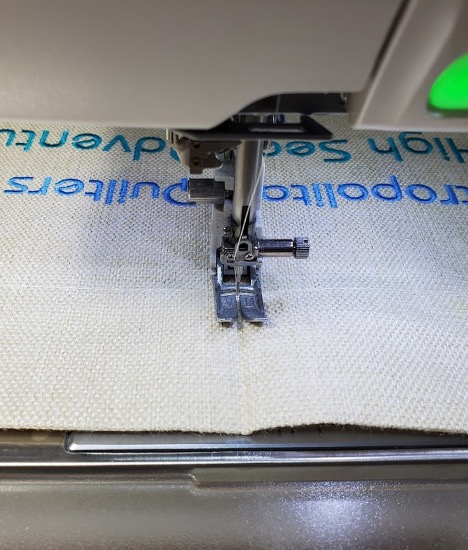
Unfold the garden flag so you’ll only be hooping one side, and center the design in the hoop. Remove the template sheet and place a piece of StitcH2O over the flag. This will make your stitches look great on top of the flag’s texture. Stitch the Design
Step 8
Remove the project from the hoop, turn over, and trim the stabilizer from the back. Remove the StitcH2O from the front, tearing away as much as possible and washing away the rest.
Step 9
Stitch a seam in the middle of the top pocket. This is where you’ll place the magnets.
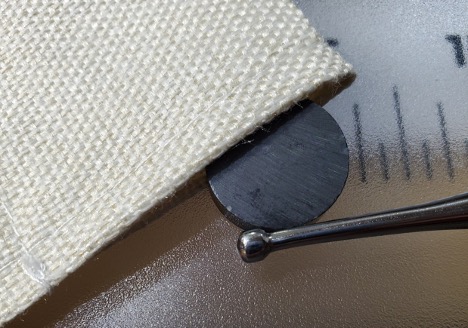
Step 10
Insert magnets in the pocket next to the seam on both sides.
Step 11
Sew another seam to make a little pocket to hold the magnet. The strength of the magnet will determine how many you will need to hold the banner to the door. We used 6. Create a pocket for each magnet so they will stay spread out.
Step 12
Stitch around 3 sides of the banner.

Step 13
Add trim to 3 sides of the banner.

JOIN US IN THE OESD COMMUNITY!
We hope you enjoyed this machine embroidery tutorial! Have you stitched your own Cruise Ship Door Banner? Come show off your work in our private Facebook group, The Perfect Stitch!