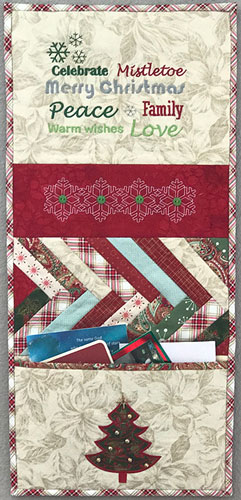
Collect your holiday greetings in this decorative pocket that will add to your cheerful décor. Simple to make, this fun project features the OESD Let It Snow design collection by Cherry Guidry. Finished Size: 12″ x 25½”
Holiday Prints
- Panels 1 & 2: Two pieces large enough to fit hoop for designs up to 8″ x 8″.
- Panel 3: Assorted prints, 20 – 22 strips – 1½” x 8″ + one 3″ square
- Panel 4: One piece, 12″ x 7¾”
- Pocket front: 12″ x 7¼” plus 5″ square of green print for tree appliqué
- Pocket front lining: 12″ x 7¾”
- Backing: 12″ x 25½”
- Triangle sleeve for hanging: Two 5″ squares
Supplies
- OESD’s Let It Snow by Cherry Guidry #80167 design collection
- Low-loft batting such as Warm ‘n Natural, 12″ x 25½”
- Binding, Bias strips, 2½” wide, pieced to make one strip, 90″ long
- OESD Applique Fuse and Fix (5″ square for appliqué fabric)
- OESD Fuse and Fleece for all four panels plus pocket
- OESD Ultra Clean and Tear stabilizer
- 505 Temporary Spray Adhesive
- Isacord embroidery thread
- Optional: 4 small decorative buttons
- Optional: several small beads for tree decoration plus gold star charm
Embroidery
1. Prepare the three pieces (panels 1, 2, and pocket front) for hooping by fusing Fuse and Fleece to the wrong side. Using temporary spray adhesive, adhere 2 layers of Ultra Clean and Tear stabilizer to the wrong side of the fused fabrics.
2. Hoop the fabric selected for panel #1. Select Design #80167-23 and enlarge the design 19% to 136 mm x 189 mm. Rotate the design if needed to fit and stitch it in the center of the hoop. Stitch.
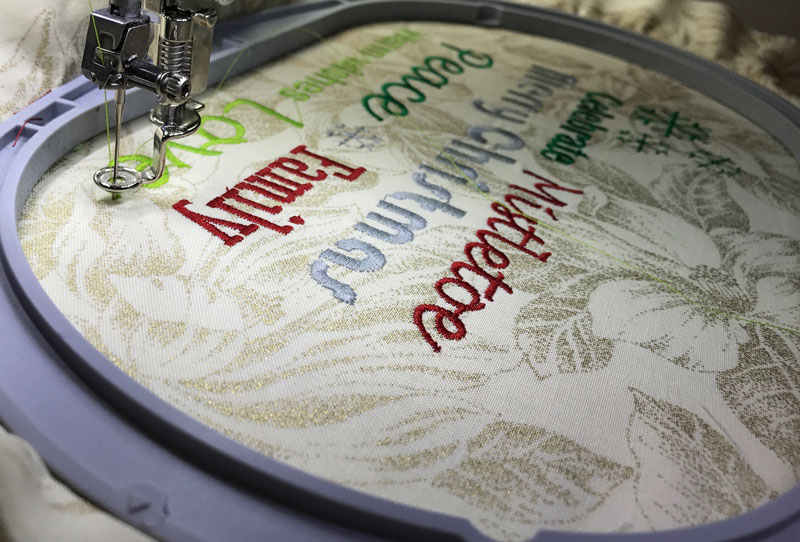
3. Hoop the second panel and select Design #80167-38. Duplicate the design 3 times (for a total of 4) and arrange them side-by-side; stitch the design in the center of the hoop.

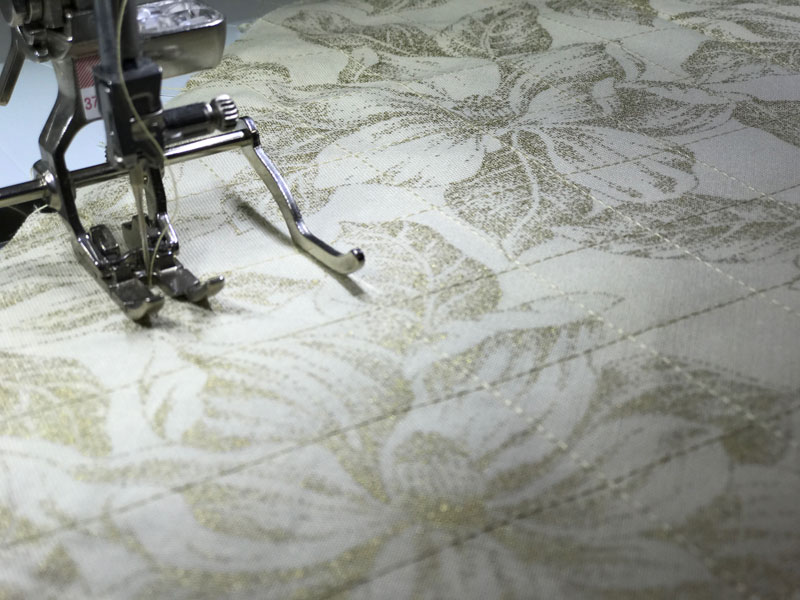
4. Quilt the pocket front (through the fabric, Fuse and Fleece and stabilizer) using the sewing machine. Sew a diagonal grid across the fabric, spacing the lines of stitching 1″ apart.
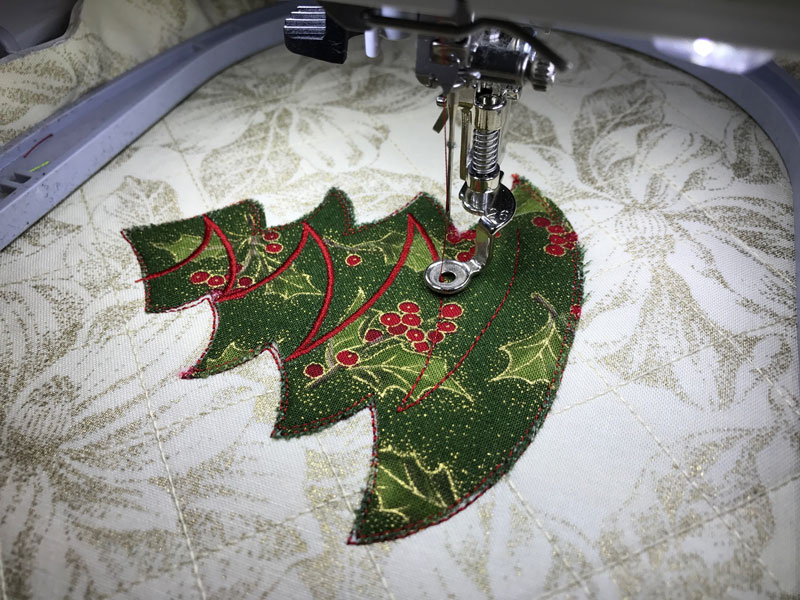
5. Hoop the quilted lower pocket front. Select Design #80167-08 and stitch the design in the center of the hoop using the pattern and the pre-cut appliqué instructions included with the design collection.
6. Once the designs are stitched, remove the tear-away stabilizers from the back (Fuse and Fleece will remain in the project).
7. Trim each piece to the indicated sizes: Panel 1: 12″ x 8½”; Panel 2: 12″ x 4¼”; Panel 3: 12″ x 6¾”.
Braided Panel 3 and Lower Panel 4
1. Cut the 3″ square across the diagonal to make two triangles.
2. Place one strip along one straight side of the triangle with right sides together; stitch using a ¼” seam. Unfold and press.
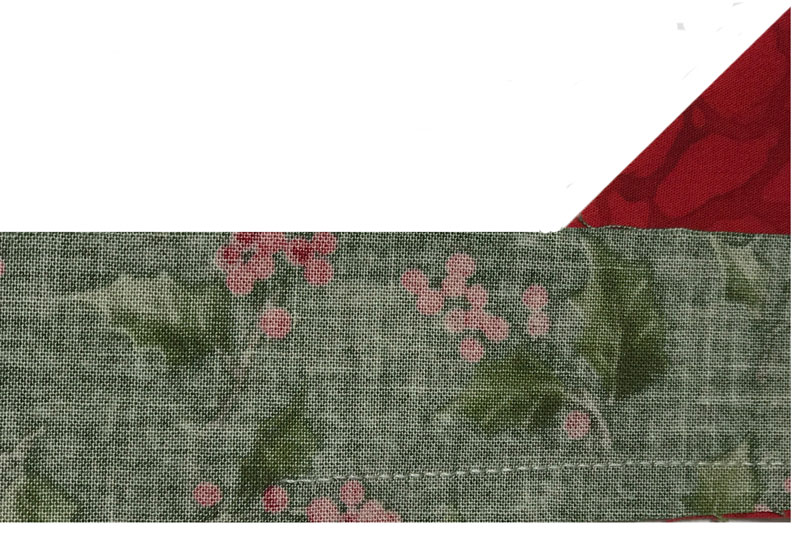
3. Position a second strip along the remaining straight side and stitch in place. Unfold and press.
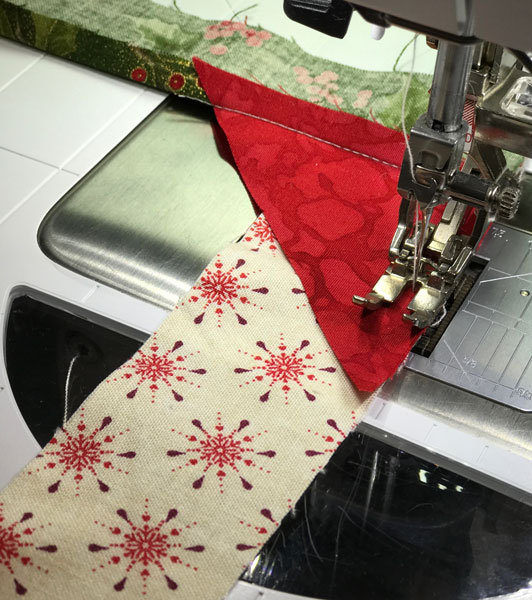
4. Continue adding strips on alternating sides, pressing each one before moving on to the next.
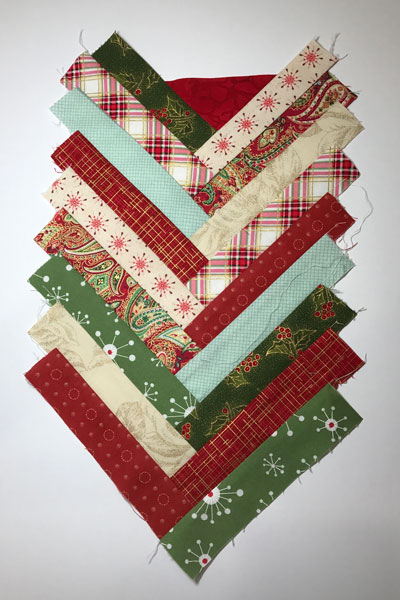
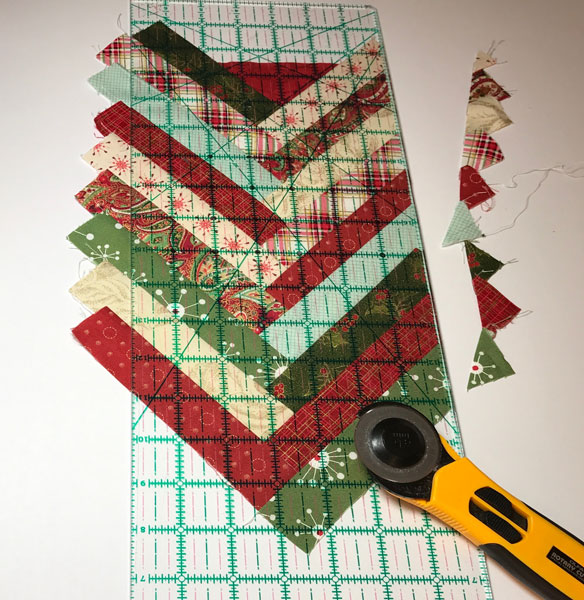
5. Trim the pieced fabric to 12″ x 6¾”.
6. Fuse a layer of Fuse and Fleece to the wrong side of the braided panel.
7. Fuse a layer of Fuse and Fleece to the wrong side of the lower panel 4.
Assembly
1. Stitch buttons, beads, and charms to panel 2 and the pocket front if desired.
2. Using ¼” seams, stitch the panels together using the diagram as a guide; press the seams open.
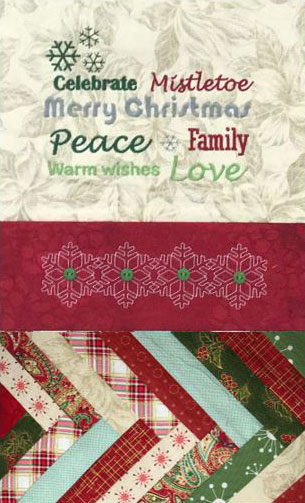
3. Prepare the pocket by placing the embroidered pocket front right sides together with the pocket lining. Stitch along the upper edge using a ¼” seam (lining will be longer). Turn fabrics to the right side, matching the lower raw edges; press. The lining will form a faux binding along the upper edge of the pocket.
4. Position the pocket on the lower panel of the front and baste or pin along the side and lower edges.
5. Create a quilt sandwich with the completed front, batting and backing, using temporary spray adhesive to adhere the layers.
6. Stitch-in-the-ditch along the horizontal seam lines between the panels.
7. Overcast or zigzag all four edges of the wall hanging.
Quilt Sleeve
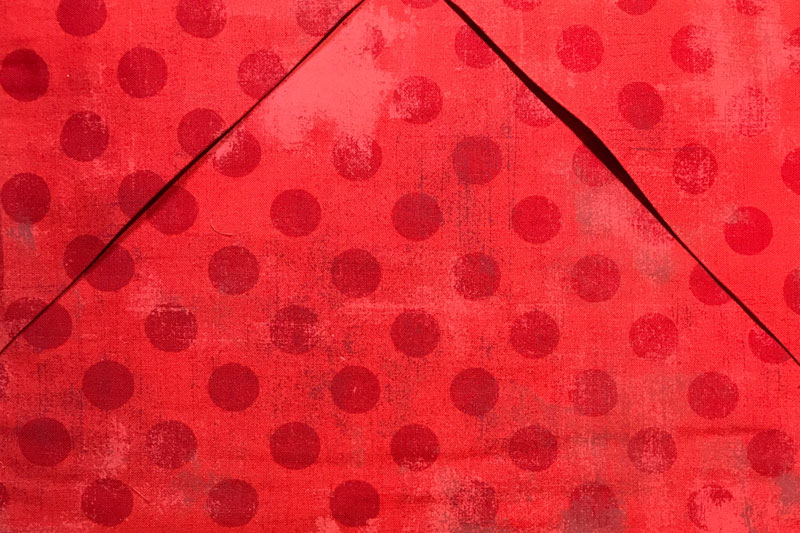
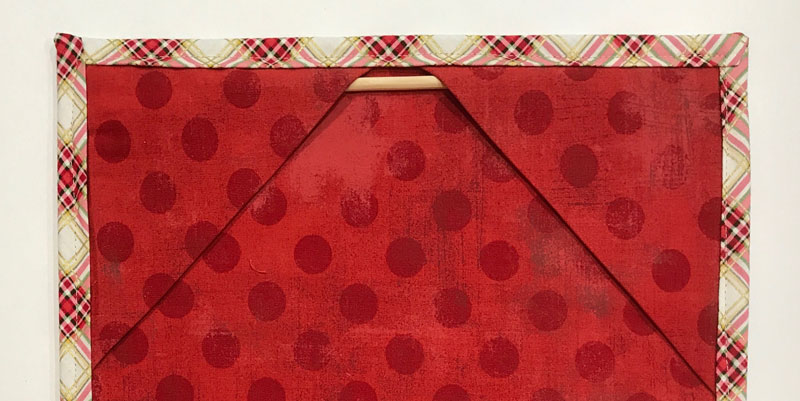
1. With right sides out, fold each 5″ square in half across the diagonal to form triangles.
2. Position the triangles at the upper edge of the quilt, matching raw edges; baste in place along the edges.
Binding
1. Fold the bias strip in half lengthwise and press.
2. Starting in the middle of one side, position the binding on the edge, aligning the raw edges.
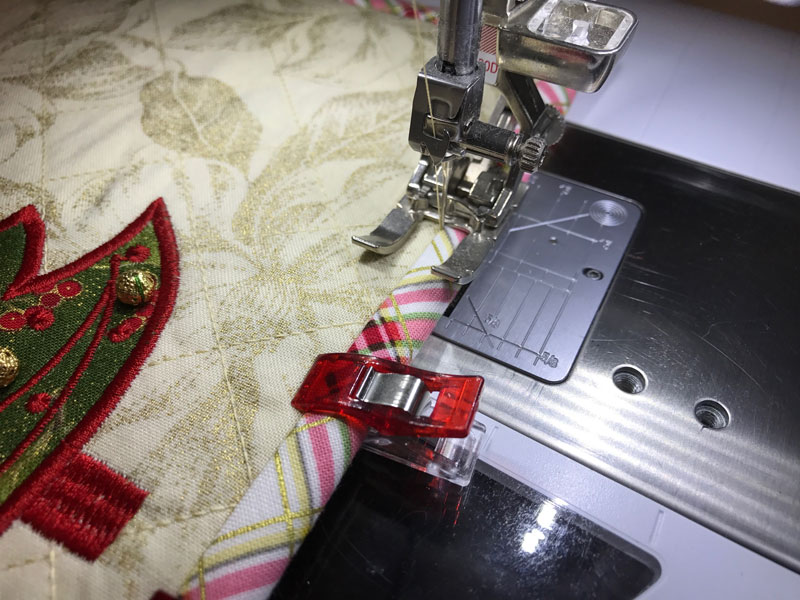
3. Stitch the binding using a ¼” seam; stop ¼” from the corner, pivot and stitch off the edge.
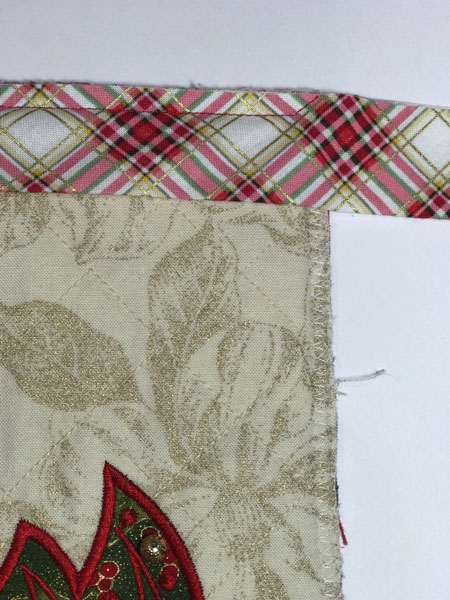
4. Flip the bias binding straight up away from the quilt.
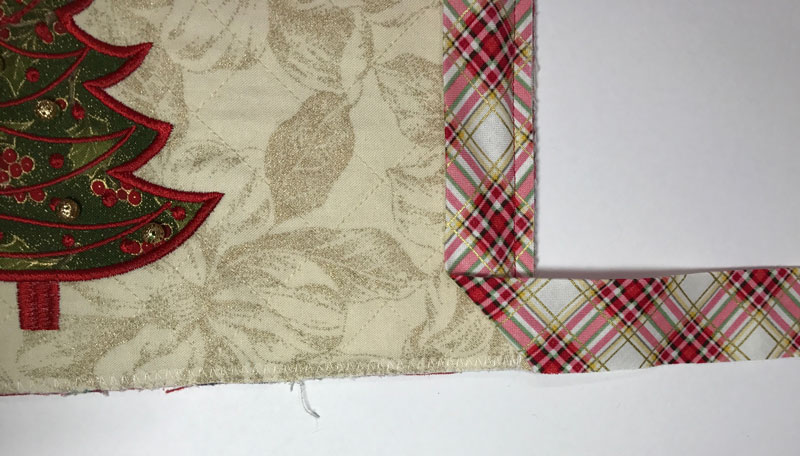
5. Fold the binding straight down and align the raw edges.
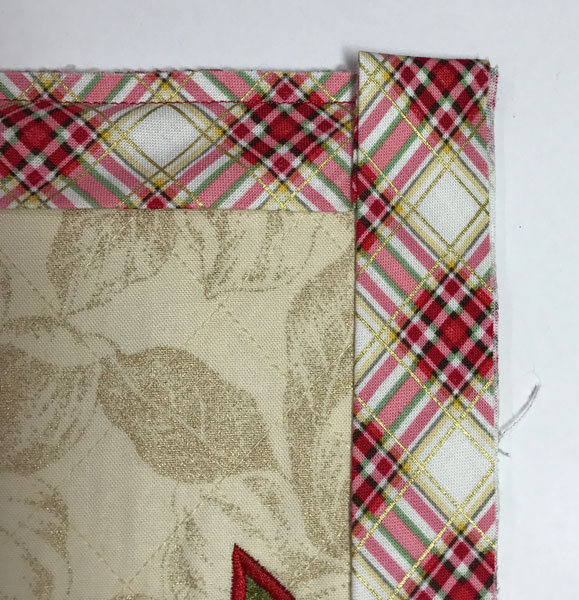
6. Continue stitching, mitering the remaining corners in the same manner.
7. Wrap the binding to the back and stitch-in-the-ditch to secure.
8. Insert a narrow wooden dowel into the sleeve triangles to hang the card pocket.
This material is © OESD, LLC and may not be reproduced or published without permission.
