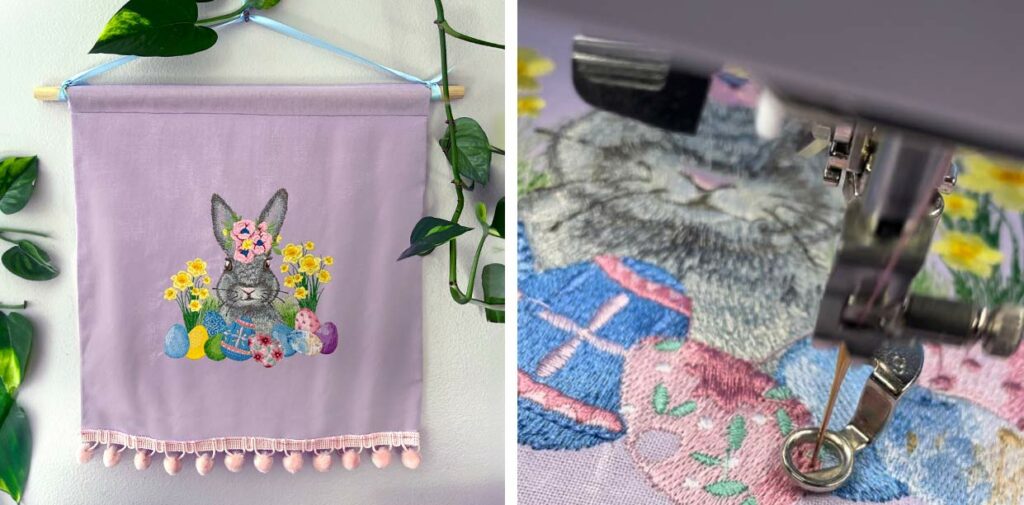
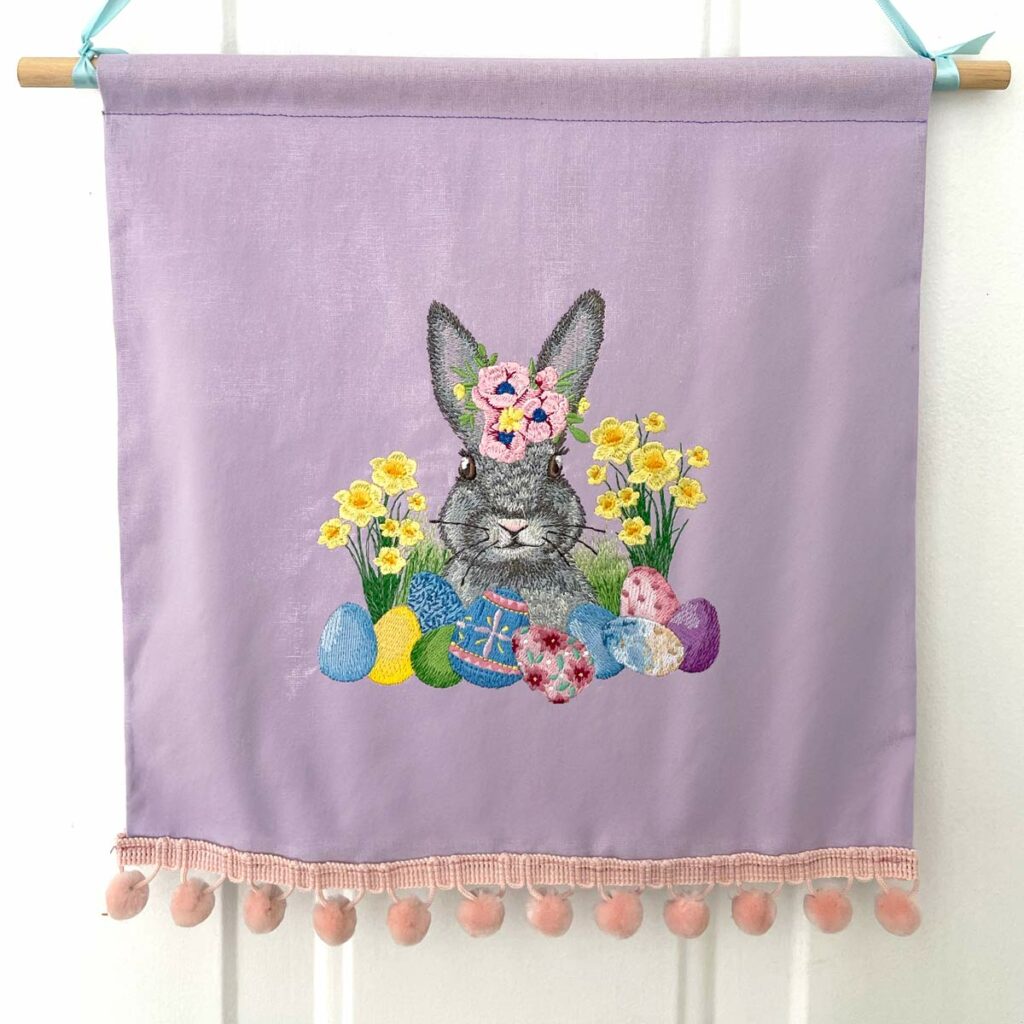
Easter is just around the corner and it’s the perfect time to add some seasonal charm to your home decor. If you’re looking for a unique and creative way to celebrate, why not try your hand at this machine embroidered Charming Easter Wall Hanging? OESD’s library of easter and spring designs includes everything from adorable bunnies to beautiful crosses. We chose the Cottontail Farm collection by Nicole DeCamp for our wall hanging. Whether you’re an experienced embroiderer or a beginner eager to learn, this step-by-step tutorial will walk you through the process of creating a Charming Easter Wall Hanging! In no time at all, you’ll have a pretty decoration for your Easter egg hunt and dinner party!
Supplies:
- Embroidery Collection of Choice – #80366 Cottontail Farm by Nicole Decamp shown here
- OESD Heavy Weight CutAway
- OESD Fusible Woven
- Fabric – 25.5” x 12.5”
- Wood Dowel – 7/16” x 14” long
- PomPom Trim 12.5” wide
- Ribbon for Hanging
Instructions:
Step 1
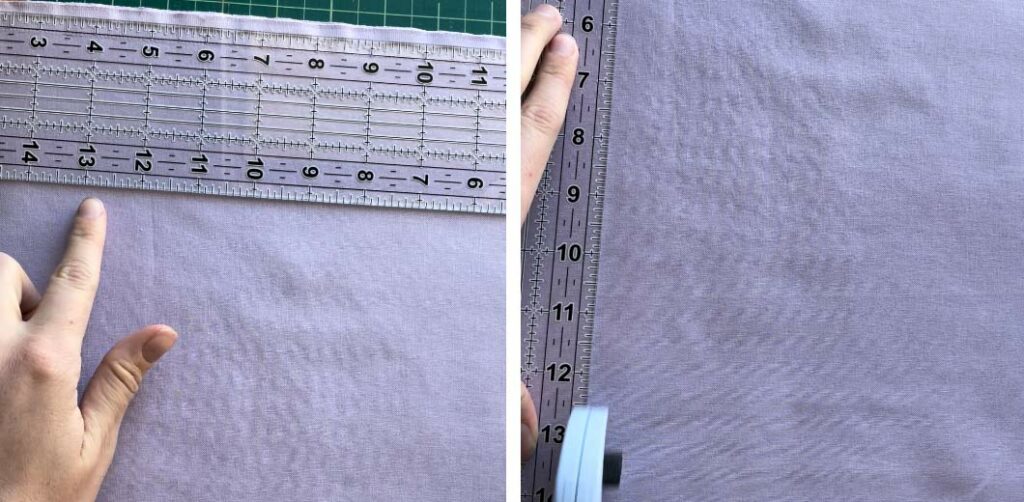
Cut your fabric to measure 25.5” x 12.5”. Apply Fusible Woven to the back of the fabric. This will give the fabric more body as well as reduce puckers and shadowing from the excess cutaway stabilizer. Fold in half lengthwise.
Step 2
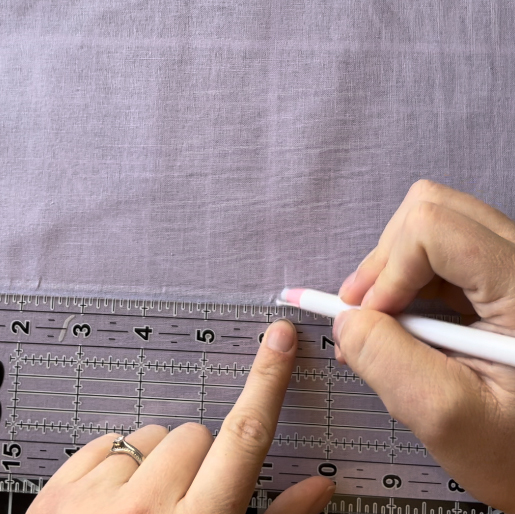
Mark the center of your folded fabric. Mark 2.5” from bottom of fabric. This will be where the bottom of the embroidery design goes.
Step 3
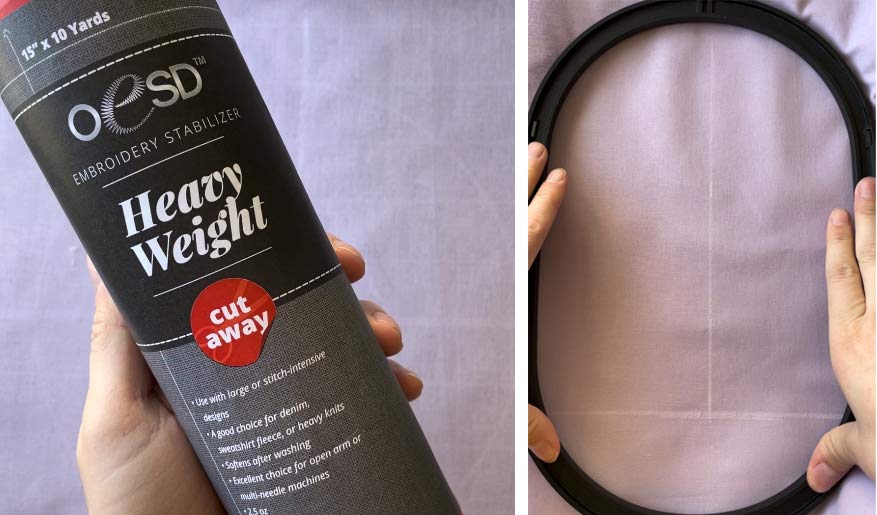
Unfold. Hoop 2 layers of Heavy Weight CutAway as well as the marked portion of your fabric.
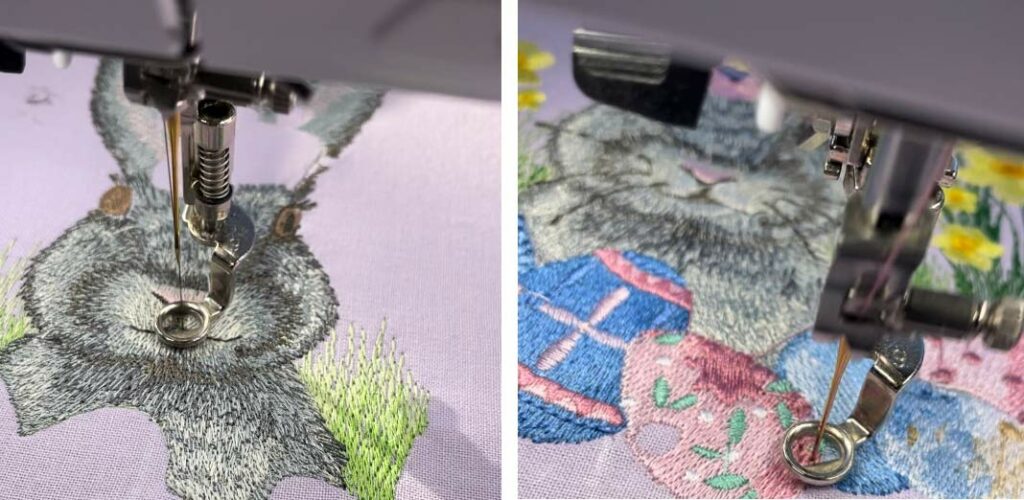
Step 4
Use your embroidery machine to line up your chosen design and stitch.
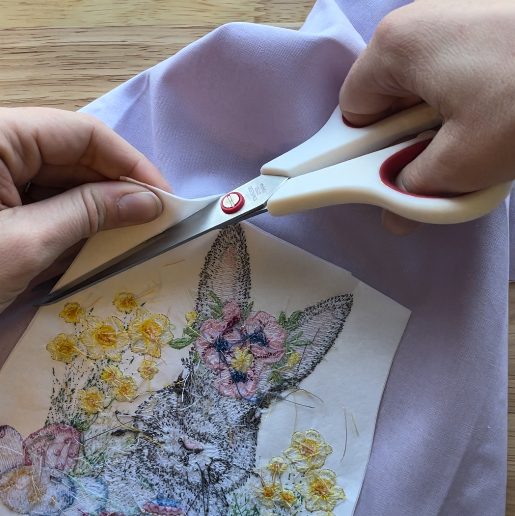
Step 5
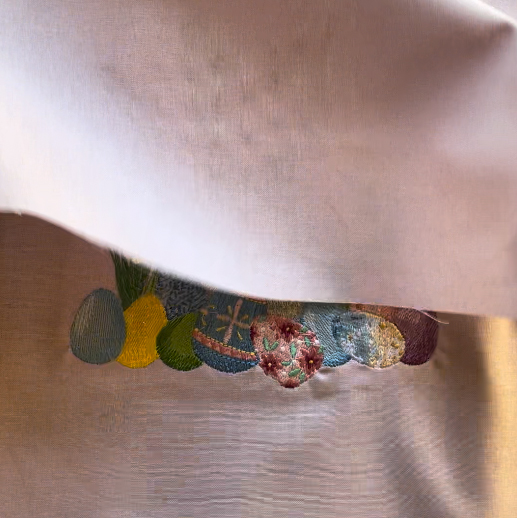
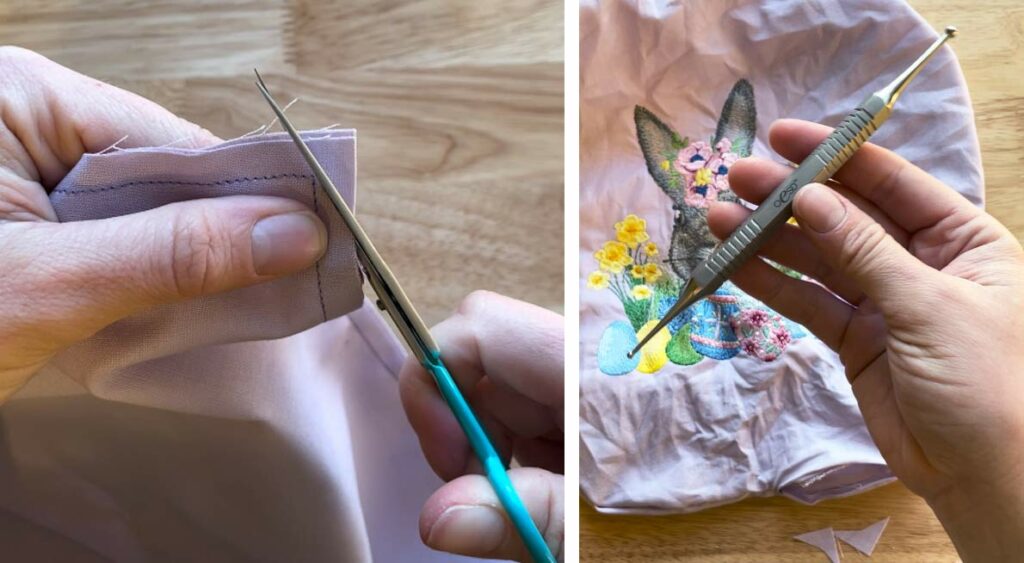
Remove the stabilizer from the back of your fabric by carefully cutting it away from the design.
Step 6
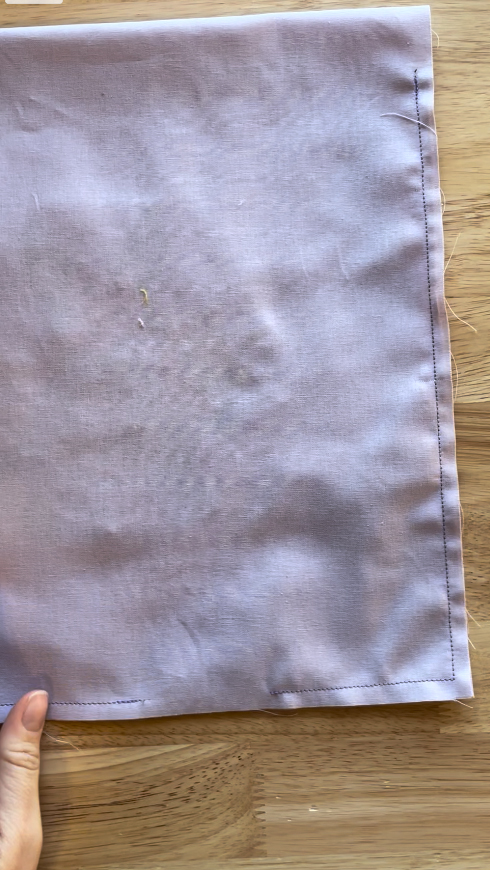
Fold fabric in half lengthwise, bringing the top to the bottom with right sides together.
Step 7
Mark 1” from the top on both sides.
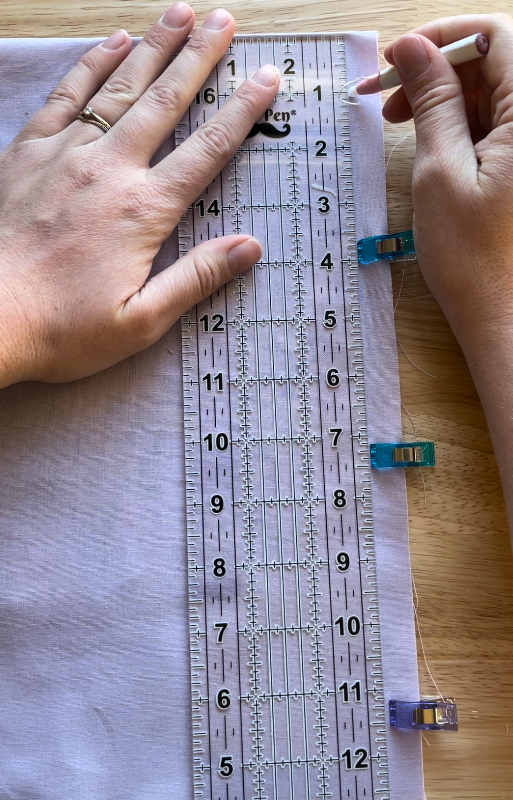
Step 8
Sew with a ¼” seam allowance down both sides and the bottom. Start and end sewing at the 1” mark on the top. You will make a pocket for the dowel later. Make sure to leave a small opening on the bottom as well. This will be used to turn the fabric inside out.
Step 9
Cut the corners and turn the fabric inside out. Use the Point and Press tool to make sharp corners. Press.
Step 10
Measure 1” Down from the top and make a line across the fabric. Top stitch along this line. This will create the pocket for the dowel.

Step 11
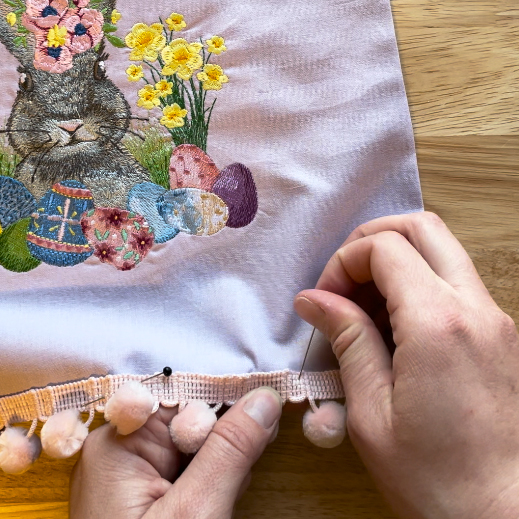
Pin the pompom trim to the bottom and sew it to the bottom edge. This will close up the opening at the bottom and add a decorative touch. ** TIP: using a zipper foot will make this easier to attach. **
Step 12
Insert dowel. Tie the ribbon to one end of the dowel. Figure out how much slack you want on the top and cut a little extra. Tie the ribbon to the other end of the dowel.
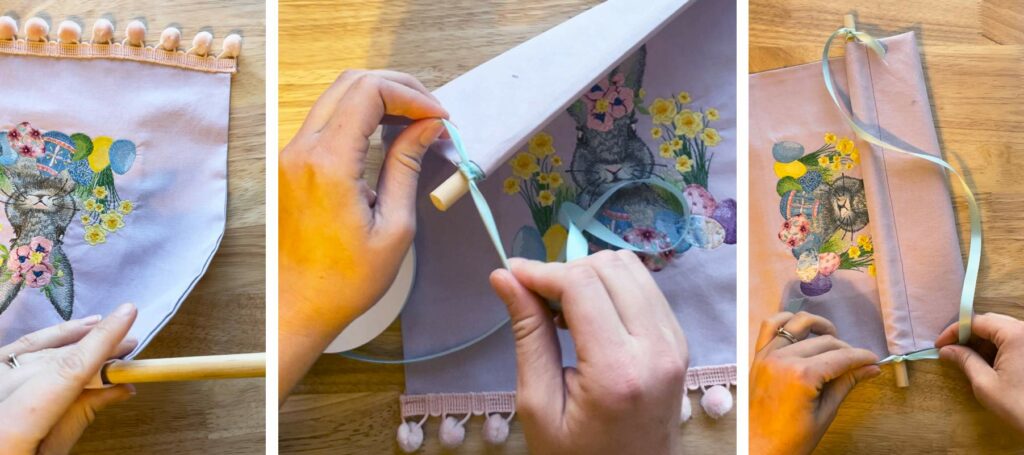
Step 13
Hang up and enjoy your Charming Easter Wall Hanging!

JOIN US IN THE OESD COMMUNITY!
We hope you enjoyed this machine embroidery tutorial! Have you stitched your own Charming Easter Wall Hanging? Come show off your work in our private Facebook group, The Perfect Stitch!