By April J.
Supplies
- OESD StabilStick Template Sheets
- OESD BadgeMaster WashAway
- OESD Fuse and Fleece
- OESD Fuse and Seal
- OESD Fusible PolyMesh CutAway
- OESD Fusible Woven
- OESD StitcH2O Topping
- OESD Expert Embroidery Tape TearAway
- OESD Expert Point and Press Tool
- OESD Perfect Embroidery Press Cloth
- OESD Perfect Punch Tool
- OESD Perfect Embroidery Press Cloth
- Embroidery Needle size 80/12
- OESD Pixie Lights Clear
Fabric
- Luxe Sparkle Vinyl by OESD, White, size 3 x 21
- OESD Clear Vinyl (Hoop size)
- 13″ x 21″ sky background fabric
- 5 “x 21” gray fabric for street
- (2) 13″ x 10″ fabrics for backside of pillow
- 1 ¾” x 44″ faux piping fabric; pink
- 1 ½” x 44″ binding fabric; dark blue
- 30 inches of piped biased binding for snow drift
- Fray Check
- Note: Fabric sizes are estimates and may result in overage.
Designs
- Tree Shopping | 12907-14
- Houses 4 | 12907-12
- Houses 2 | 12907-10
- Houses 3 | 12907-11
- Houses 1 | 12907-09
- Four Season Quilting | 12860-01M
- Fill it Up Quilting | 82032-04
- Holly Jolly Snowflakes | 12836-09
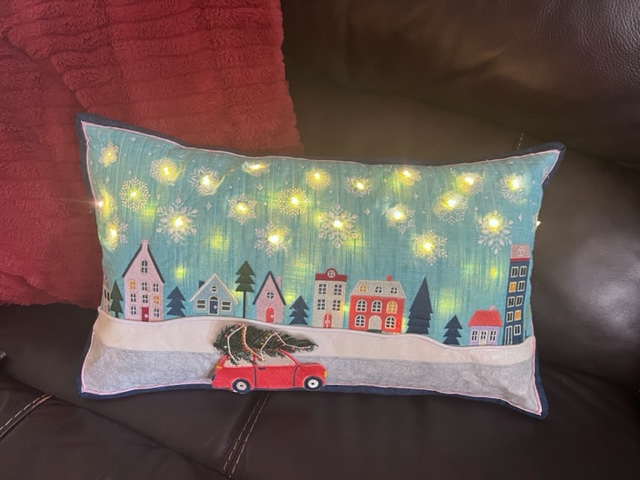
Making the 3D Car
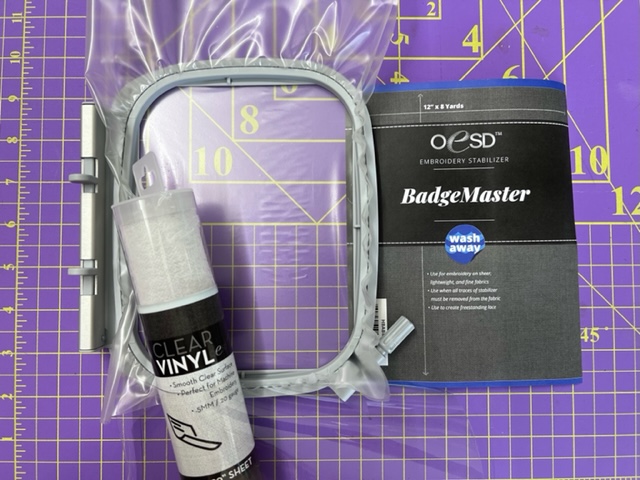
Step 1: To make the car and Christmas tree hoop a piece of clear vinyl BETWEEN two layers of BadgeMaster. Stitch design Tree Shopping 12907-14.
I wanted the car to feel like it was traveling along the road. To give this 3D effect I stitched it as a patch, tearing away the BadgeMaster, then trimming 1/8 inch around the car.

Step 2: Prep a piece of 13″ x 21″ background fabric with Fusible Woven.
Step 3: Cut a piece of Fusible PolyMesh to 19″ x 30″.
Fuse PolyMesh to the back of the Fusible Woven.
Cut a 13″ x 21″ piece of Fuse and Fleece. Center and fuse to the back of the Fusible Woven.
Mark the center position on the fabric. You can see the pink mark of my center on the left.
Step 4: Print off Four Season Quilting #12860-01M, onto a Template Sheets. Using the template sheet and positioning tools in your embroidery machine, quilt the entirety of the background fabric. Use a template sheet to reposition the edge-to-edge quilting.
NOTE: Template Sheets are not stitchable. This is for placement only.


Step 5: Mark the fabric at 12″ x 20″. Mark 1/4 inch from the top 12″-inch” edge. Using Holly Jolly #12836-09, stitch hanging snowflakes across the top of the quilted background fabric. Ensure the stitching begins at the 1/4 mark. This is visible on the left side of the pic.
Step 6: Mark background fabric to 9 1/4″ x 21″ with a fabric marking pen. This will be our trim line once the houses are stitched. Extra fabric will be needed for hooping – but we’ll get to that later.
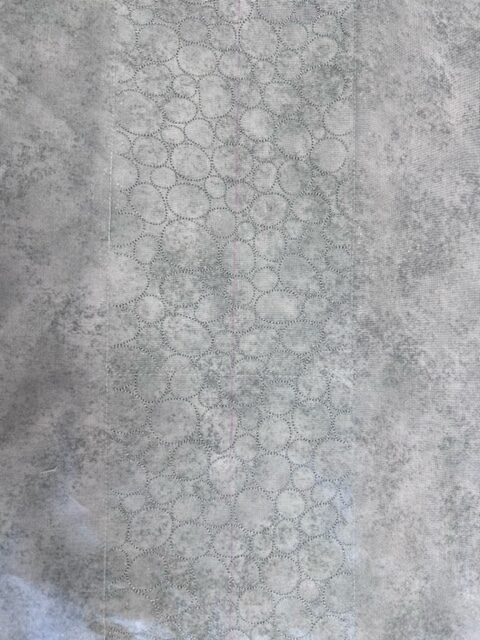
Step 7: Iron a 4 x 21-inch gray fabric to Fuse and Fleece. Mark the gray fabric down the middle long side. Open Fill It Up Quilting #82032-04 and reduce the design to 60%. Stitch the cobblestone design and line up subsequent designs using your machine-specific placement icons.
Note: I didn’t use a template sheet for placement but you could if you wanted to. Also You could stitch any design here that you want. I want this section to look like a road.
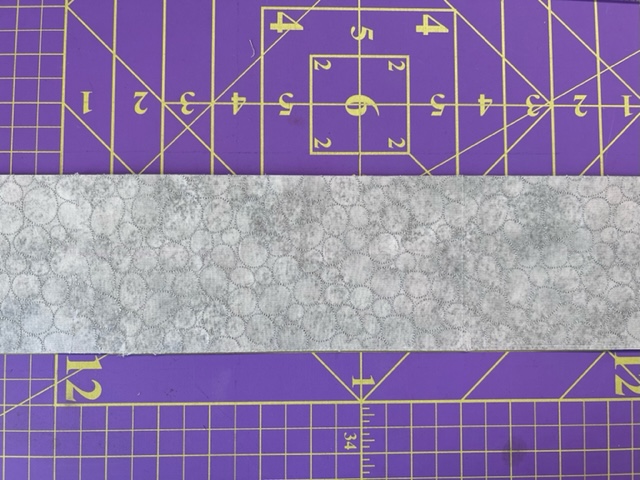
Step 10: Trim cobblestone quilted fabric to 3 ½” x 21”.
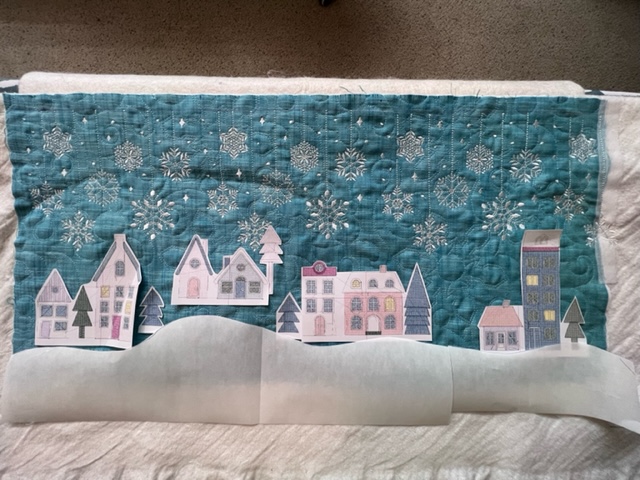
Step 11: Print design 12907-09 – 13 onto Template Sheets. Cut the individual houses apart and place them on the quilted background fabric.
Scatter the houses and trees so they look like they are in a neighborhood. This is the fun part and there is no wrong way to ‘scatter’ the houses. Let’s have fun with this.
Step 12: Remove the individual template sheets prior to stitching. It’s very important to not stitch through the template sheet.
Stitch the house and tree motifs using placement tools in your machine.
Step 13: Cut a 3″ x 21″ piece of white Luxe Sparkle Vinyl.
Trim to look like snowbanks.
Note: I used printer paper first to achieve the look I wanted. I then taped the paper together to create a template for the Sparkle Vinyl.

Step 14: Stitch the piped bias binding the wrong side of the Luxe Sparkle Vinyl on the top curved edge.
Step 15: Topstitch the snowbank to the background fabric covering the bases of some of the houses.
Step 16: Sew quilted background with vinyl snowbank to the cobblestone fabric.
Step 17: Punch holes in the centers of the dangling snowflakes using the Perfect Punch Tool and a 3mm tip.
Tip: Use Fray Check on the punched holes to keep the fabric from fraying.
If you don’t wish to add pixie lights to the pillow, skip this step.


Step 18: Cut two 13” x 13” pillow background fabrics.
Step 19: Fold down short raw edges twice, then top stitch along the fold.
Step 20: Overlap the pillow background fabric with the stitched pillow front—wrong sides together. Stitch together with ¼ inch seam.
Step 21: Sew faux piped binding together, then to the finished pillow.
Step 18: Cut two 13” x 13” pillow background fabrics.
Step 19: Fold down short raw edges twice, then top stitch along the fold.
Step 20: Overlap the pillow background fabric with the stitched pillow front—wrong sides together. Stitch together with ¼ inch seam allowance.
Step 21: Sew faux piped binding together, then to the finished pillow, binding around the edges.
Step 22: Prep the backside of the car with Fuse and Seal to adhere to the “cobblestone road once the pillow is constructed. Score the Fuse and Seal on the backside of the car. Place the car along the road to your liking. Place an Embroidery Press Cloth on top of the car and adhere it with an iron. Allow cooling before touching.
Step 23: Place pixie lights through the punch holes. Insert a pillow form. Enjoy!

