Create a doll of a little girl’s dreams. Easily personalizable, these easy and fun to make stitch ‘n’ turn dolls make treasured gifts.
How many girls do you know who love dolls? Dolls are part of many little girls’ dreams. What if you could make a doll exactly as the little one dreamed with their favorite colors? The Stitch ‘N’ Turn Dolls #12544 embroidery collection gives you the ability to personalize dolls for a treasured gift.
The collection has two different doll faces with different hair styles to choose from. Use different thread colors and fabrics for the body to create a special doll. The dress can be a holiday fabric or any cotton prints. The face, arms and legs can be different skin tones by choosing different colors of fabrics. Your doll can wear leggings to coordinate with the dress by changing the upper and lower legs fabrics. Or just change the upper legs for shorter leggings. And the shoes can coordinate with the outfit. The options are limitless!
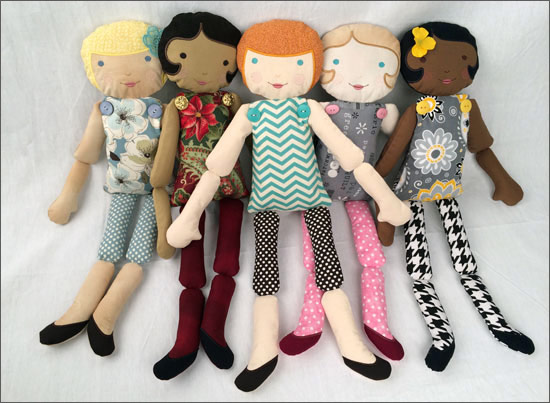
Let’s look at the basics of how the Stitch ‘N’ Turn Dolls #12544 are made. Complete instructions are included with the thread charts when you purchase the embroidery collection. First, decide on the fabrics and color choices. We have listed some additional color options in the thread chart. Next gather your embroidery supplies – OESD PolyMesh CutAway stabilizer, temporary spray adhesive, and embroidery threads
Let’s start stitching. You will stitch out one of the doll face appliques, a doll dress, upper arms, lower arms, upper legs and lower legs applique. Start with 2 layers of PolyMesh CutAway stabilizer in the embroidery hoop. You will use 2 layers for each hooping. Lightly spray with temporary spray adhesive. This doll example uses the Doll Face 2 Applique. Stitch the first color called Head Placement Stitch. I used a thread color that blended with my fabric.
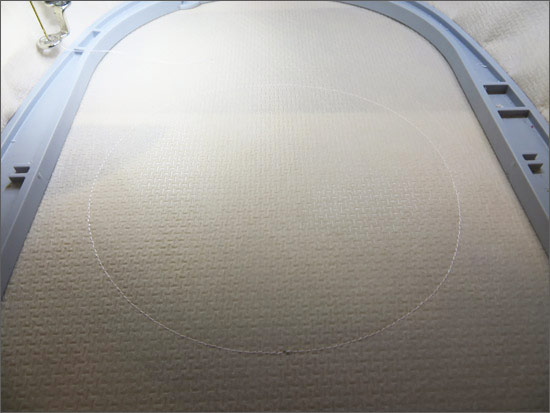
Place face fabric right side up onto the stabilizer, being sure to cover all of the placement stitch. Stitch the second color called Head Tackdown/Center and Attach Point. Stitch the face features – nose, cheeks, lips, mouth and eyes. Next stitch the Hair Placement Stitch.
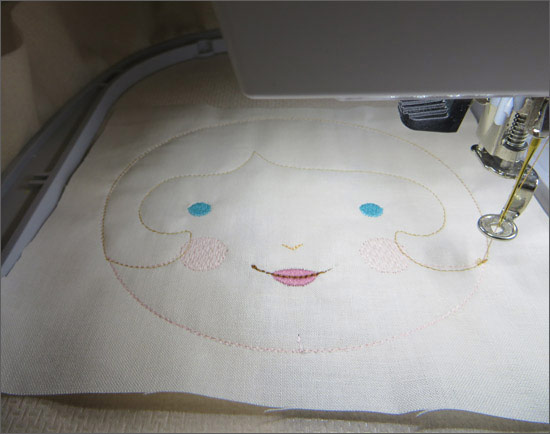
Place the Hair Applique fabric right side up over the placement stitch. Stitch the Cut Line and Tackdown using the same thread. Carefully cut away the excess applique fabric using a small pair of double curved embroidery scissors.
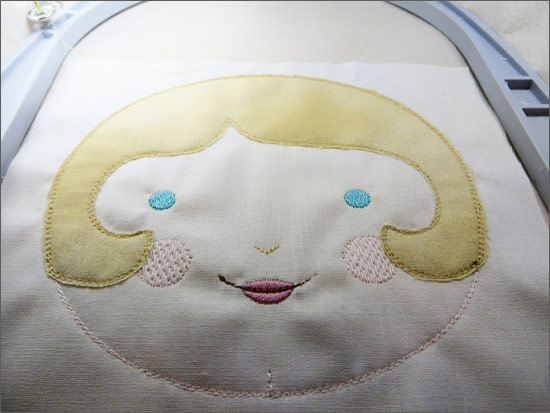
Next stitch the Hair Cover Stitch with same thread. I find it easier to go ahead and clip all jump threads now before I place the next fabric. Place the Back of Hair fabric right side down directly over the first piece. Continue stitching with the same color of thread and stitch the final color called Seam.
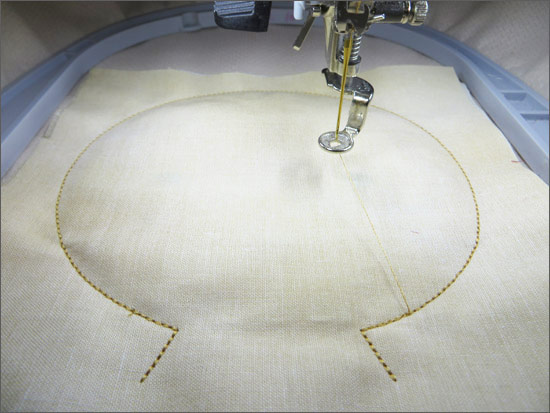
Now remove the project from the hoop. Use pinking shears to carefully cut out the project close to the stitching line which helps to keep the fabrics from fraying. Continue cutting around the stitches at the opening to create a tab. Clip any corners as needed.
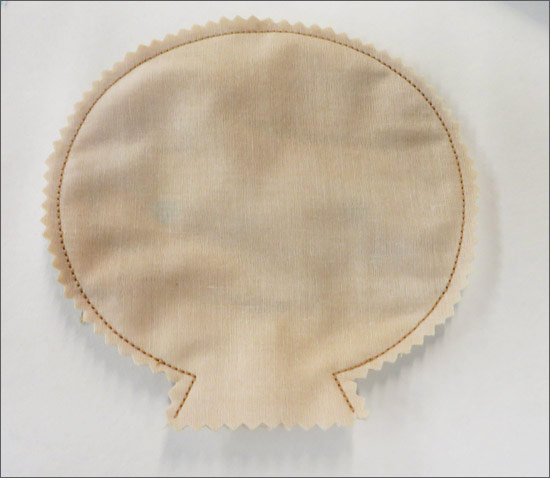
Turn the project right side out and use a chopstick or point turner to turn out corners and curves. Now, it is time to stuff with polyester fiberfill. To create a smoother project, use small amounts of fiberfill instead of larger pieces. When the project is stuffed firmly, fold the tabs in and slip stitch the slit closed with hand needle and small stitches.
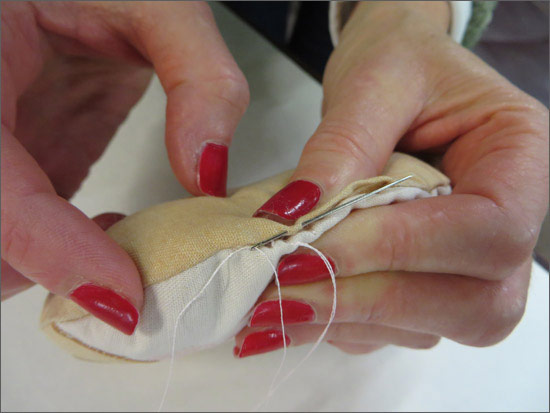
Continue stitching the remainder of the pieces to make the doll using this method. Once your pieces for the doll are complete, then it is time to assemble her. Lay out the doll pieces as shown.
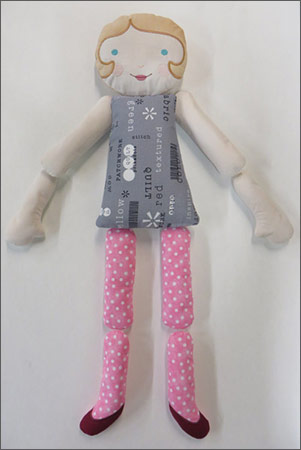
Start with the upper arms and dress first. Stitch the upper arms to either side of the dress, lining up the X’s and placement lines using buttons. I use a metal clip to help hold the pieces in place while stitching. And to make the pieces easier to sew, push the stuffing out of the area where the X’s and placement lines are.
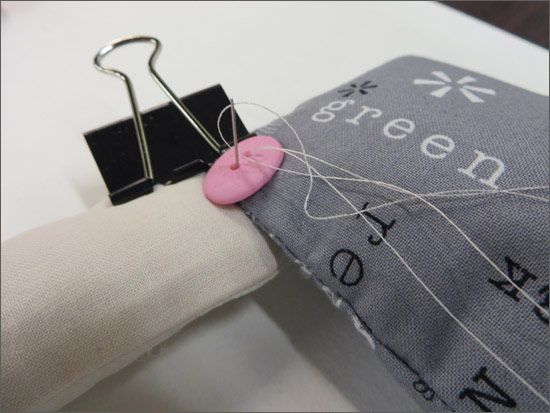
Next, attach the head, matching the placement line of the head to the top of the dress. To make it simpler, place the pieces right sides together, then bring the needle through all the layers. Stitch close stitches one way and then crisscross back over the stitches and knot to secure. Before clipping the thread close to the knot, take the needle into the project and back out about ½” away from knot and then trim the thread. That way there will be no little threads sticking out.

Attach the upper legs to the bottom of the dress using the same method of stitching as above. Continue stitching the lower legs and lower arms in the same manner. You can also add flowers to the hair on either side of the head to accessorize. Now your doll is complete.
Share photos of your special dolls by emailing [email protected]. We would love to see them!
This material is © OESD, LLC and may not be reproduced or published without permission.
